15 years one-stop China custom CNC machining parts factory
Home / About / Quality Control Process /
The following testing process takes a product as an example. As a reference, the specifications, dimensions, precision, and processing technology requirements of each CNC machining part are different, and the testing process standards are also different. Everything is tested for the purpose of customer requirements. To ensure high-quality prototypes and parts.
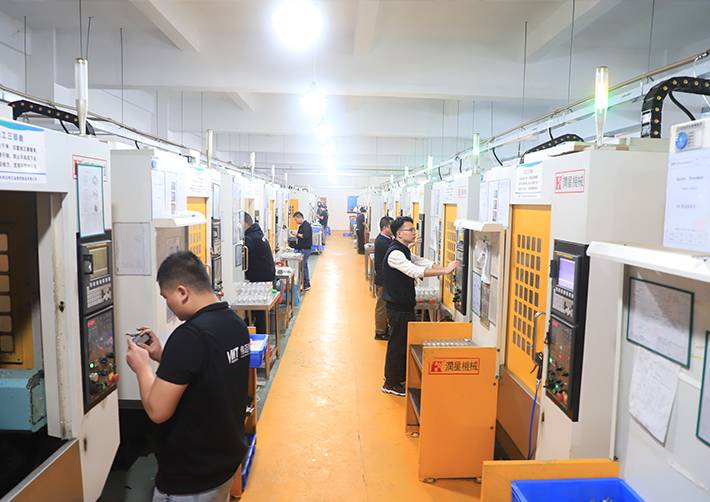
The review of the CNC machining factory is the basis for the start of each project. The following aspects should be considered when selecting a suitable CNC machining factory:
Process capability: It is necessary to know whether the factory has the corresponding CNC processing equipment and technology, and whether there are experienced engineers and operators. Relevant information can be obtained by viewing the factory's website, and samples, or contacting the factory for consultation.
Quality management: It is necessary to know whether the factory has a complete quality management system and whether there are quality assurance measures. You can refer to the factory's certification qualifications (such as ISO 9001, and IATF 16949) or quality feedback for evaluation.
Lead time: It is necessary to know whether the factory can complete the production tasks and deliver the products on time to avoid affecting their business plans.
Service level: It is necessary to understand the service level of the factory in the pre-sales, sales, and after-sales links, including communication, technical support, and problem-solving capabilities.
Price competitiveness: It is necessary to know whether the price level of the factory is reasonable, and compare it with other factories to ensure that the price offered by the selected factory is within the reasonable level of the market.
When finally choosing a factory, it is necessary to comprehensively consider the above factors and make a choice according to the actual situation.
|
DFM Analysis
The main purpose of DFM (Design for Manufacturability, Design for Manufacturability) analysis is to locate and solve possible manufacturing problems in the early stages of product design and development, so as to ensure that the product can be successfully launched within the budget, time and quality requirements. DFM analysis usually needs to consider the following aspects to meet customer needs:
Production process: By analyzing the production and processing process of the product, find out the possible manufacturing difficulties and limitations, and propose corresponding solutions.
Cost control: Optimize product cost and reduce manufacturing cost through reasonable product design and process selection, so as to meet customer's cost requirements.
Quality Control: By analyzing design and process defects, avoiding or minimizing possible defects in the manufacturing process, to meet customer requirements for product quality.
Supply chain management: through communication and collaboration with suppliers, optimization of procurement logistics and other links, improve the efficiency of the supply chain, so as to better meet customer needs.
Reliability: By analyzing the problems that the product may encounter during use, improve the life and reliability of the product, so as to meet the customer's requirements for product life and reliability.
To sum up, DFM analysis needs to consider multiple factors to ensure that the product can successfully meet the needs of customers.
|
|
|
|
Raw Material Testing
The following requirements are raw material testing methods for one product as an example. Different products have different raw material testing requirements:
1. Receive raw materials. Sampling inspection is carried out after receiving the raw materials, and visually check whether there is any problem with the appearance, quantity, and specifications of the materials. There is no damage to the surface and the packaging is in good condition. Quantities and specifications are in accordance with the delivery note of the purchase order. Reject if there is any problem.
|
|
|
Raw material testing usually needs to consider the following aspects:
Appearance quality inspection: inspect the appearance of raw materials, including whether the surface is smooth, whether the color is uniform, whether there is oil or impurities, etc.
Dimensional accuracy detection: measure the size of raw materials to ensure that they meet the design requirements. It can be measured with tools such as micrometers, altimeters, and optical imagers.
Chemical Composition Testing: Analyze the chemical composition of raw materials to determine whether their purity and composition meet the requirements of product design and manufacturing. It can be detected by chemical analysis, spectral analysis and other methods.
Testing of mechanical properties of materials: Test the mechanical properties of raw materials such as tension, compression, and torsion to evaluate whether their physical properties such as strength, toughness, and hardness meet the requirements. It can be tested with the universal testing machine and other equipment.
Environmental adaptability testing: test the stability of raw materials under different environmental conditions such as temperature, humidity, and corrosion resistance to evaluate their ability to adapt to different working environments.
To sum up, raw material testing needs to be combined with product design and production requirements, and a variety of testing methods and tools are used for testing to ensure that the quality of raw materials meets the requirements of product manufacturing.
|
CNC Turning
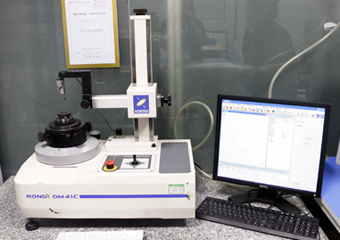
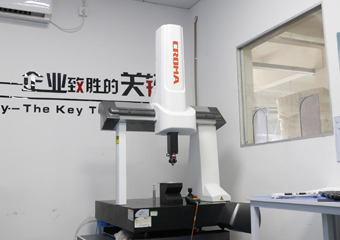
When CNC machining parts, the structure of the parts is different, and the processing procedures are also different. Here I take a product as an example. This part needs to be CNC turned first and then CNC machined. According to the drawings, the size and appearance that meet the customer's requirements are processed. Check and check every 2 hours with calipers and height gauges during CNC turning. If the CNC machine tool breaks or the pillar wears during the machining process, or when the CNC machine tool is replaced for the next process, it is necessary to re-check the parts. If the parts have roundness requirements, they need to be tested with calipers, height gauges, three-coordinates, and roundness meters to ensure that the CNC machining quality can be carried out to the next process and delivered on time.
|
|
|
|
CNC Machining
The CNC machining process is similar to the CNC turning process. During the CNC machining process, the inspection is performed every 2 hours. Due to the different processing procedures, the inspection place is also different. If there are processed threads, you need to use height gauges, three-coordinates, and tooth gauges for inspection. If the CNC machine tool is in the process of processing, the tool is broken or the props are worn, or when the CNC machine tool is replaced for the next process, the parts need to be inspected again.
|
|
|
Patrol inspection During the production process, IPQC conducts patrol inspections on key links to find problems in time and take corresponding measures to ensure product quality and production efficiency.
The process and standards of inspection IPQC can be summarized as the following steps:
Formulate the inspection plan: determine the time, place and content of the inspection, and prepare the inspection schedule.
Preparation before inspection: Check whether the inspection tools and instruments are normal, and prepare record forms and related materials.
Inspection operation: carry out inspections one by one according to the inspection plan and record the inspection results.
Problems found: If unqualified problems are found, they should be marked in time and the relevant responsible person should be notified to deal with them.
Dealing with problems: According to different problems, take corresponding measures, including shutdown rectification, rework, equipment adjustment, etc.
Record and summary: record the inspection results on the inspection form, and summarize and count according to the requirements to provide data support for subsequent analysis.
Inspection IPQC standards mainly include the following aspects:
Inspection frequency: Determine the inspection frequency and inspection time according to product characteristics, process requirements, production cycle and other factors.
Inspection content: inspect the key links and important parameters, and record the corresponding data or status.
Inspection standards: According to product quality requirements and process specifications, determine the qualification standards and judgment standards for inspection items.
Inspection records: record the results of inspections, including the number of qualified products, the number of unqualified products, types of problems, and handling measures.
To sum up, inspection IPQC needs to formulate a reasonable inspection plan, operate according to relevant standards, find and deal with problems in a timely manner, and record and summarize them to ensure product quality and production efficiency, and to avoid problems in a timely manner. Solve, save cost and time.
Through the above inspection IPQC process and standards, it can be ensured that there are problems in the CNC machining process, which lead to product scrapping, and can also avoid problems in time, solve them in time, and save costs and time.
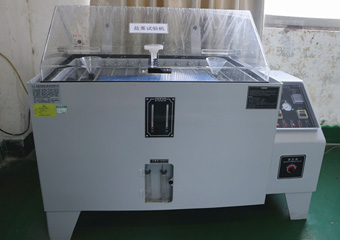
Testing equipment is generally used to test the quality, performance and specifications of different items. Common testing equipment includes the following categories:
Dimensional measuring equipment: used to measure various dimensional parameters of items, such as length, width, height, diameter, depth, etc. Such as micrometers, altimeters, optical comparators, etc.
Physical performance testing equipment: used to test the physical properties of items, such as strength, hardness, toughness, impact performance, etc. Such as a universal testing machine, Rockwell hardness tester, impact testing machine, etc.
Chemical composition analysis equipment: used to analyze the chemical composition of items, such as element content, components, impurity content, etc. Such as spectrometer, electron microscope, atomic absorption spectrometer, etc.
Surface inspection equipment: used to detect the defects, shape, flatness and roughness of the surface of the article. Such as testing instruments, scanning electron microscopes, laser interferometers, etc.
Environmental detection equipment: used to detect the influence of temperature, humidity, noise, vibration and other factors in the environment on the product. Such as temperature and humidity meters, sound level meters, vibration meters, etc.
To sum up, different types of testing equipment are suitable for different products and indicators. Selection and application according to specific testing requirements can effectively improve product quality and production efficiency.
 |
 |
 |
||||||
|
|
|
|
||||||
|
|
|
|
|
Surface Treatment
Surface treatment management and control refers to the management and control of the product surface treatment process to ensure that the treatment effect meets the design requirements, so as to achieve the purpose of improving product quality and reducing the defective rate. It mainly includes the following aspects:
Determine the process: According to product requirements and material characteristics, determine the appropriate surface treatment process, and formulate corresponding operating specifications.
Raw material inspection: inspect the purchased raw materials to ensure that the materials meet the standards and can meet the needs of surface treatment.
Oxygen test: take samples first to test oxygen to see if the surface effect meets the customer's requirements. After the customer confirms, it can be oxidized in batches.
Equipment inspection: conduct daily inspections and regular inspections of surface treatment equipment to ensure the normal operation of the equipment and compliance with operating specifications.
Operator training: Conduct professional training and skill assessment for surface treatment operators to ensure that they have the necessary operating knowledge and skills.
Process parameter control: Strictly control various process parameters in the surface treatment process, such as temperature, time, solution concentration, etc., to ensure a stable treatment effect.
Quality inspection: Carry out quality inspection on the products after surface treatment, such as appearance, roughness, thickness, adhesion and other indicators, to judge whether the treatment effect meets the requirements.
Recording and analysis: Record and analyze various data in the surface treatment process to find and solve problems in time, and continuously improve and optimize the process flow.
To sum up, surface treatment control needs to be managed and controlled from multiple aspects to ensure that the quality and effect of the surface treatment process meet the design requirements.
|
|
|
|
External Detection
Some CNC machining parts have high requirements on appearance. We will conduct an appearance inspection to detect whether there are problems such as yin and yang, color difference, burrs, bumps, and other problems after appearance oxidation, and record and analyze them. If it is a structural part, the detection is different. |
|
|
|
Custom Logo
If the customer requires a customized logo on the surface, the logo is processed and manufactured at the end. There are many ways to process the logo, and the effects are also different, including laser engraving, printing, etching, etc. During laser engraving, we will also conduct patrol inspections and record analysis to prevent surface problems during laser engraving and affect delivery. |
|
|
|
Full Inspection
If the customer has high requirements on the appearance and size of the parts, we will choose to use testing equipment such as height gauges, three-coordinates, tooth gauges, roundness meters, calipers, etc. to conduct a comprehensive inspection of the roundness, size, and thread of the parts. The inspection results of each part are recorded and classified for scrap or rework. Everything is based on customer drawings and size requirements. |
|
|
The full inspection standard of CNC machining parts can be formulated according to the different requirements of the processed products, and generally should include the following aspects:
Dimensional accuracy: measure the various dimensional parameters of the CNC machining parts to judge whether they meet the design requirements. When measuring, it is necessary to choose the appropriate size measuring equipment, such as a micrometer, altimeter, etc.
Surface quality: Check the CNC machining surface to judge whether it is flat, smooth, free of burrs and bubbles and other defects. Appropriate surface inspection equipment, such as microscopes, imagers, etc., should be used during inspection.
Material composition: chemically analyze the materials used in CNC machining parts to determine whether their composition meets the requirements. Appropriate material analysis equipment, such as spectrum analyzers, electron microscopes, etc., are required for analysis.
Physical properties: test the physical properties of CNC machined parts, such as strength, hardness, toughness and other indicators. When testing, it is necessary to select the appropriate physical performance testing equipment, such as a universal testing machine, hardness tester, etc.
Accuracy stability: Carry out dimensional deformation test on CNC machining parts to judge its accuracy stability. Appropriate deformation testing equipment, such as a three-coordinate measuring machine, is required for testing.
To sum up, the full inspection standard of CNC machining parts needs to comprehensively consider multiple factors, including dimensional accuracy, surface quality, material composition, physical properties, precision stability and other indicators. At the same time, it is necessary to select appropriate testing equipment, and methods, and formulate reasonable testing procedures and standards to ensure that the quality and accuracy of CNC machining parts meet the design requirements.
|
Package
The packaging method of CNC machined parts can be determined according to the specific situation, but materials such as foam plastic, foam cardboard, bubble film, and cartons are usually used for packaging protection. When selecting packaging materials, factors such as the shape, size, weight, and material of the parts should be considered, and appropriate packaging methods and materials should be selected to ensure that the parts are not damaged during transportation. At the same time, moisture-proof, shock-proof, anti-static and other issues should be paid attention to during the packaging process to ensure the quality and stability of the parts.
|
|
|
|
Shopping
Shipping: We use UPS, DHL, EMS, TNT, FEDEX and other express for CNC machining parts sample shipping. We can arrange air or sea shipment for bulk shipment according to your requirements. When choosing a shipping method, factors such as the weight, size, quantity, and transportation distance of the parts should be considered, and the most economical, safe, and fast method should be selected for shipping. At the same time, parts need to be inspected and packaged before shipment to ensure their quality and integrity. |
|
|
Quality inspection reports are an important tool to ensure the quality and precision of your CNC machining work. We can provide a comprehensive overview of the finished product with a detailed test report on material and product performance, either from an in-house auditor or a third-party laboratory. Ensure the finished product meets all customer requirements.
|
Qualify Evaluation Report
For each order we receive, we can provide a list of quality inspection reports according to your processing requirements.
Certificate
|
|
|
VMT is dedicated to providing outstanding prototype and CNC machined parts that meet your specific requirements. If your order does not meet your processing requirements, we can rework or refund. If you encounter any quality problems within one month of receiving the goods, please feel free to contact our CNC machining experts. If you have any questions after receiving the goods, please contact us immediately, we will reply to you and give you a solution as soon as we receive the email.
|
Rework Conditions
If you encounter problems during CNC machining, please confirm first, if not, we will re-examine the design and samples, and hold a meeting to discuss the solution. If there is a problem after receiving the goods, we will arrange a video conference immediately after receiving the feedback in the email, communicate with our experts, solve it in the easiest and fastest way and resend a new sample instead.
|
|
Refund Conditions
After receiving email feedback, we will conduct video or telephone communication as soon as possible to confirm that the product problem is caused by us and cannot be repaired, and we will quickly process refunds and returns.
|


 2024-08-02
The manufacturer is strongly recommended. In the past few years of cooperation we have ordered several machined products from aluminum and stainless steel. These products are manufactured in compliance with tolerance requirements and require product finish. Now I have ordered another one. The service is excellent and any questions can be answered and resolved in time.



 2021-05-13
The dimensions are all customized according to my drawings no tolerance issues and the parts are delivered on time. I am very satisfied with it.


 2021-04-06
I pay much attention to the surface treatment aspect of this product. I was a little worried about the cooperation at the beginning. I am very satisfied with the product now and hope to cooperate for a long time.


 2022-09-22
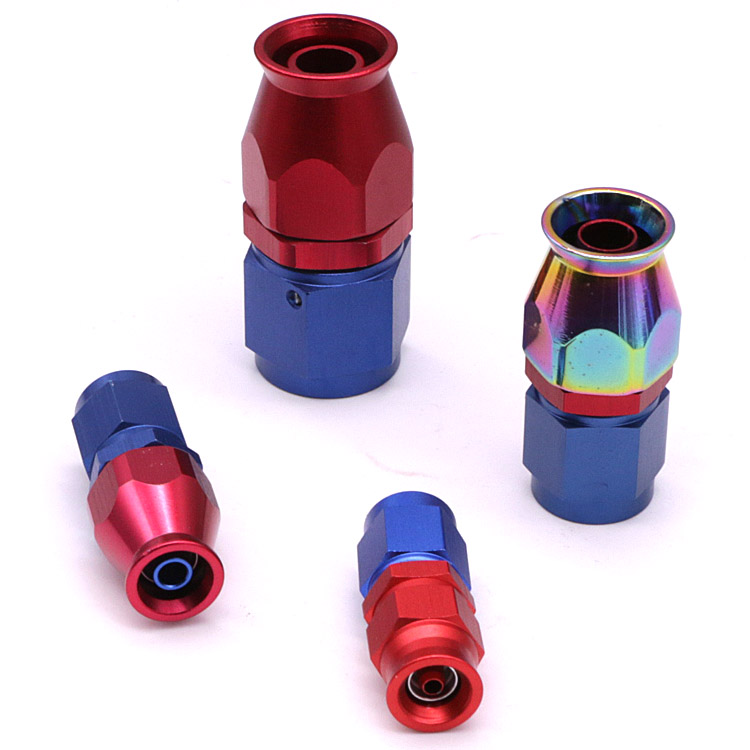
AN8 Straight PTFE Hose End Fitting for PTFE Fuel Line Fitting Adapter Black Blue Red
