15 years one-stop China custom CNC machining parts factory

Hey there I’m VMT Sam!
With 25 years of CNC machining experience we are committed to helping clients overcome 10000 complex part-processing challenges all to contribute to a better life through intelligent manufacturing. Contact us now
 318 |
Published by VMT at Dec 15 2022
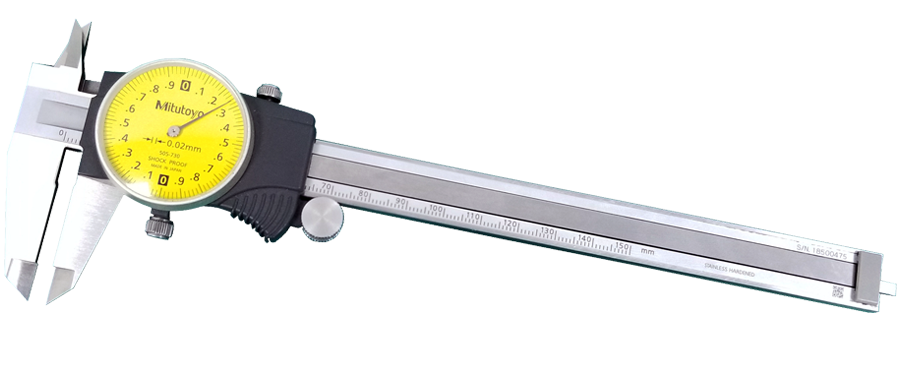
For CNC parts machining factories, calipers are one of the most common testing equipment we must have. Then, after machining CNC parts, we do not know how to read, save and pay attention to calipers. What should I do? Now the VMT CNC machining company will explain it in detail for you. Have you seen your method?

Caliper Reading
First take the machined part and use a caliper to pull it to the outer diameter where the part is located.
A. Read the integer - look at the left side of the zero line of the vernier, the value of the nearest scribed line on the ruler, and read the integer part of the measured size;
B. Read the decimals again - look at the right side of the zero line of the vernier, count out the number of scribe lines of the vernier aligned with the numerical scribe line of the ruler body, and read out the decimal part of the measured size (that is, multiply the vernier reading value by its alignment with the scribe line) sequence number);
C. Obtain the measured size - add the integer part and the decimal part of the above two readings, which is the measured size of the caliper.
Storage Method
After using the vernier caliper, VMT recommends cleaning it with cotton yarn. When not in use for a long time, it should be rubbed with butter or oil, the two measuring claws should be closed and the fastening screws should be tightened, and then put into the caliper box and cover it.
Vernier calipers are available in 0.1 mm (10 equal divisions on the vernier), 0.05 mm (20 equal divisions on the vernier), and 0.02 mm (50 equal divisions on the vernier), 0.01 mm (The vernier scale is marked with 100 equal divisions) 4 minimum reading values.
Precautions
1. The vernier caliper is a relatively precise measuring tool. It should be handled with care and must not be collided or dropped. When using, do not use it to measure rough objects, so as not to damage the measuring claw, and avoid putting it together with cutting tools, so as not to scratch the surface of the vernier caliper.
2. The caliper should be wiped clean before measurement, and check whether the two measuring surfaces and the measuring edge of the caliper are straight and undamaged. The lines should be aligned with each other. This process is called proofreading the zero position of the vernier caliper.
3. When moving the ruler frame, the movement should be free, it should not be too loose or too tight, and there should be no shaking. The caliper reading should not change when the frame is secured with the set screw. When moving the ruler frame, VMT recommends not to forget to loosen the fixing screw, and it should not be too loose to prevent it from falling off.
4. When measuring parts with vernier calipers, excessive pressure is not allowed, and the pressure used should make the two measuring claws just touch the surface of the parts. If the measurement pressure is too large, not only will the measuring claw bend or wear, but also the measuring claw will be elastically deformed under the action of pressure, making the measured size inaccurate (the outer size is smaller than the actual size, and the inner size is larger than the actual size).
5. When reading on the vernier caliper, the caliper should be held horizontally, facing the direction of the light, so that the person's line of sight is as perpendicular to the surface of the caliper as possible, so as to avoid reading errors caused by the skewed line of sight.
6. Written at the end In order to obtain correct measurement results, VMT recommends that you can measure several times. That is, measurements are made in different directions on the same section of the part. For longer parts, measurements should be made at various parts of the entire length to obtain a more accurate measurement result.
The above is about the reading method, storage method and precautions of the CNC parts machining measuring caliper. I don't know if you are using it correctly?
Ready To Start Your Next Project?
Get Instant Quote

Request a Free Quote
Send us a message if you have any questions or request a quote. We will get back to you ASAP!