16 years one-stop China custom CNC machining parts factory

Hey there I’m VMT Sam!
With 25 years of CNC machining experience we are committed to helping clients overcome 10000 complex part-processing challenges all to contribute to a better life through intelligent manufacturing. Contact us now
 476 |
Published by VMT at Aug 05 2026 | Reading Time:About 7 minutes
476 |
Published by VMT at Aug 05 2026 | Reading Time:About 7 minutes


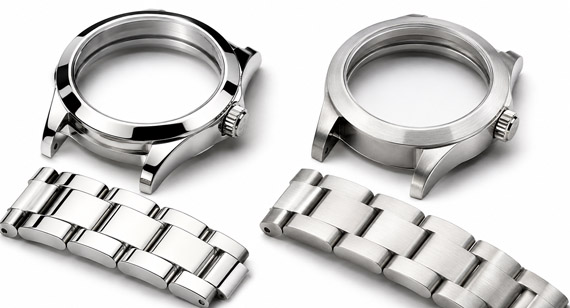
A stainless steel watch case may be dimensionally correct after CNC machining but still be rejected because of visible tool marks, rounded bevels, uneven brushing, polishing waves, or inconsistent gloss. Uncontrolled polishing can also change crystal seats, threads, sealing surfaces, lug geometry, and bracelet fits. A controlled finishing process protects both appearance and assembly.
Stainless steel watch case polishing normally includes pre-finish inspection, deburring, progressive grinding, rough polishing, intermediate polishing, fine or mirror buffing, cleaning, and dimensional and cosmetic inspection. Mixed finishes require defined brushing direction, masking, protected edges, and an approved master sample to maintain consistency.
The following guide explains the tools, stages, risks, and inspection methods used to create premium polished and brushed watch cases and bracelets without sacrificing functional dimensions.
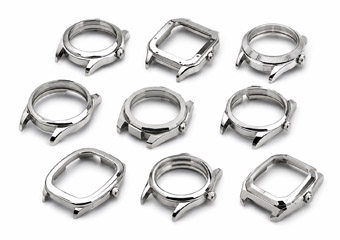
Stainless steel watch case polishing is a subtractive surface-finishing process that progressively removes machining marks, scratches, small surface irregularities, and earlier abrasive patterns to create a smoother and more reflective surface.
It is different from applying a coating. Mechanical polishing changes the existing metal surface by removing a controlled amount of material. Because material is removed, polishing can also change:
The process may use abrasive belts, stones, nonwoven wheels, sisal wheels, cloth wheels, cotton or flannel wheels, and polishing compounds. Abrasive manufacturers provide different products for grinding, refinement, finishing, and mirror polishing, while compound manufacturers classify products by cutting and finishing performance rather than color alone.
Polishing should therefore be treated as part of the manufacturing plan—not as a cosmetic operation added after machining is complete.
The external finish is one of the first qualities your customer notices when handling a watch. A premium surface should appear controlled from different viewing angles and should remain consistent across the case, bezel, case back, crown, clasp, and bracelet.
A poor process may create:
These issues can make an accurately machined part look inexpensive. More importantly, excessive polishing can turn a cosmetic problem into a functional problem by changing a crystal fit, case-back interface, gasket surface, or bracelet connection.
Polishing Should Achieve Two Objectives
A finish that looks attractive but causes assembly problems is not an acceptable manufacturing result.
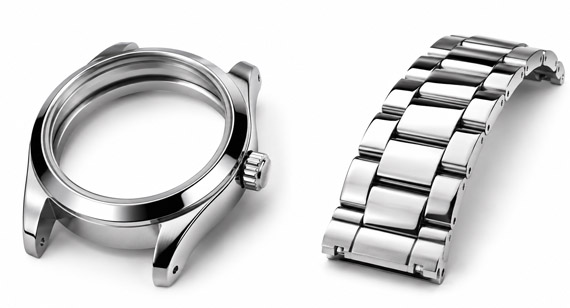
A watch case and a stainless steel bracelet may use similar abrasives and compounds, but their finishing risks are different.
| Area | Watch Case | Watch Bracelet |
| Main geometry | Cavities, lugs, bezels, chamfers, case-back interfaces | Repeated links, center links, outer links, clasp parts and pins |
| Main dimensional risk | Crystal seats, sealing faces, threads, lug holes and crown openings | Link width, pin holes, screw holes, articulation gaps and clasp fit |
| Cosmetic challenge | Maintaining defined curves, flats, bevels and mixed-finish boundaries | Maintaining the same finish across many small repeated components |
| Workholding challenge | Holding the thin-wall case without scratching or distortion | Holding small links without rounding edges or losing orientation |
| Brushing challenge | Keeping grain direction aligned with case geometry | Maintaining identical grain direction across every link |
| Polishing challenge | Preventing waves and edge loss on visible surfaces | Preventing inconsistent gloss and rounded link corners |
| Cleaning challenge | Removing compound from holes, grooves, threads and cavities | Removing compound from link gaps, pin holes and assembled joints |
| Batch risk | Visual variation between cases | Variation between individual links within one bracelet |
A bracelet may require polishing before assembly, after partial assembly, or through a combination of both. The exact sequence depends on the link design, pins, screws, finish boundaries, and accessibility.
316L Stainless Steel
316L is widely selected for watch cases and bracelets because it provides a practical combination of corrosion resistance, formability, manufacturability, and cosmetic finishing capability. It is a low-carbon austenitic chromium-nickel-molybdenum stainless steel.
It can support:
Its polishing plan must still account for work hardening, machining marks, burrs, cutting heat, and the amount of material remaining on decorative edges.
904L Stainless Steel
904L is a high-nickel and molybdenum austenitic grade selected where higher corrosion resistance or a specific premium material specification is required. It is generally more demanding and costly to machine and finish than standard 316L.
The polishing team should validate:
304 Stainless Steel
304 may be used for selected bracelet, clasp, decorative, or general stainless steel components when permitted by the customer’s drawing and product requirements.
It should not be substituted for 316L simply to reduce cost without customer approval. The exact grade affects corrosion performance, machining behavior, finishing response, material traceability, and product positioning.
Tip: State the exact material grade on the drawing and purchase specification. Terms such as “stainless steel” or “watch-grade steel” are not precise enough for material control.
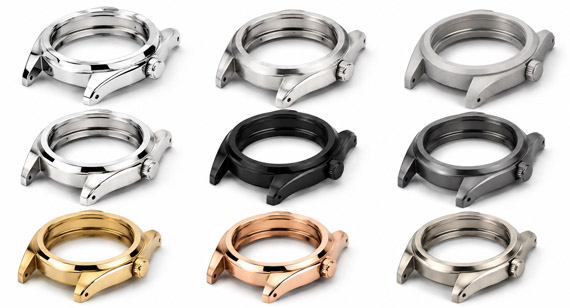
Mirror Polishing
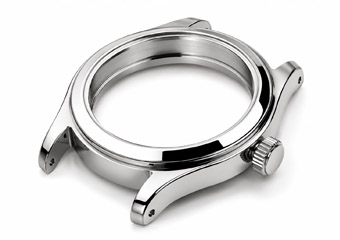
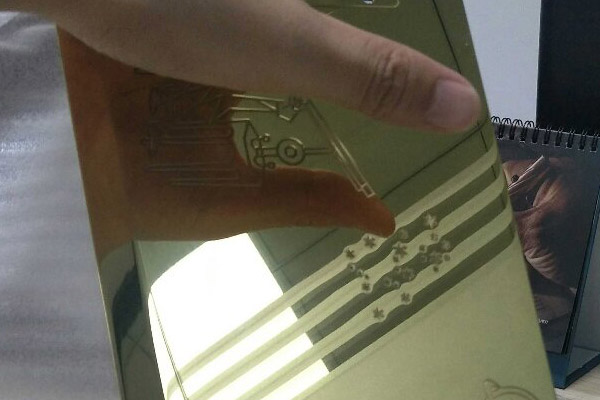
Mirror polishing creates a highly reflective surface with progressively refined abrasive marks.
It is commonly used on:
A mirror finish reveals surface waviness easily. The reflected image should appear smooth according to the approved appearance standard rather than distorted by low spots, over-polished areas, or inconsistent pressure.
Menzerna identifies stainless steel watch housings and bracelets as applications requiring a deep mirror finish without visible micro-scratches or polishing marks under the relevant inspection conditions.
Directional Brushing
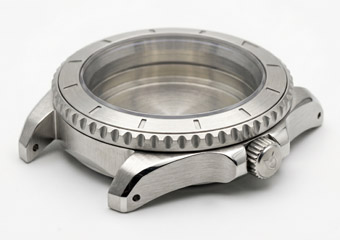
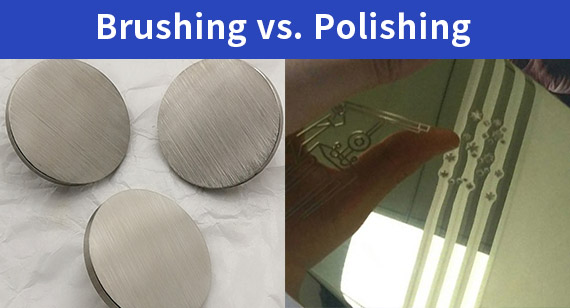
Brushing creates a controlled linear grain.
It is often used on:
The drawing or physical sample should define:
Satin Finishing
A satin finish has a softer and more diffuse appearance than a bright mirror polish. It may be produced with fine abrasive media or nonwoven finishing products.
“Satin” is not a complete technical specification. The customer should approve a physical sample because different abrasive products and processing parameters can produce very different textures.
Bead Blasting
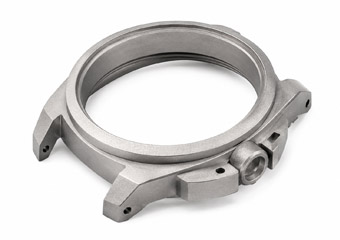
Bead blasting can create a uniform matte appearance before passivation, coating, or another subsequent process.
The process should control:
Mixed Polished and Brushed Finishes
Many premium watch cases combine:
Mixed finishes are difficult because every process can affect the adjacent surface.
The finishing sequence must define:
PVD-Ready Polishing
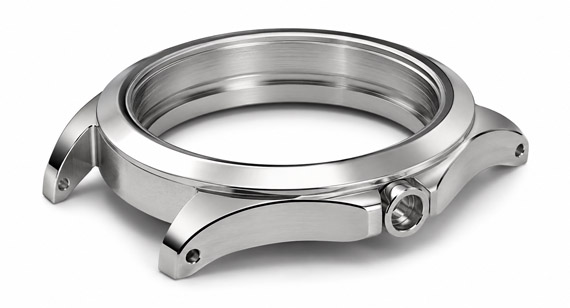
PVD does not automatically hide grinding marks, scratches, waves, or polishing defects. Surface preparation can remain visible after coating.
A PVD-ready watch case should therefore be inspected before coating for:

The correct tool depends on the starting surface, stainless steel grade, feature geometry, required finish, and amount of material that can be removed.
| Tool | Typical Function | Main Risk |
| Abrasive belt or disc | Remove heavy machining marks and establish an initial surface | Excessive material removal and loss of flatness |
| Oil stone or abrasive stone | Local correction of tool marks and small defects | Creating low spots or localized geometry changes |
| Flap wheel | Blend surfaces and refine grinding marks | Edge rounding and uneven pressure |
| Nonwoven abrasive wheel | Produce satin or brushed finishes and blend surfaces | Inconsistent grain direction or over-blending |
| Sisal wheel | Rough polishing and removal of earlier abrasive patterns | Heat buildup, edge rounding, and heavy cutting |
| Stitched cloth wheel | Intermediate polishing and surface refinement | Uneven pressure and compound contamination |
| Loose cotton wheel | Fine polishing and gloss development | Loss of sharp transitions |
| Flannel wheel | Final buffing and mirror finishing | Overheating and residual fine polishing patterns |
| Small felt point or bob | Polish restricted areas and local features | Local over-polishing and dimensional change |
| Polishing compound | Provides cutting or finishing action with the selected wheel | Wrong compound, mixed compounds, or contaminated wheels |
| Masking material | Protect polished, brushed, threaded, or sealing areas | Irregular finish boundaries |
| Ultrasonic cleaner | Remove compound and contamination after polishing | Residue remaining in blind holes or incomplete drying |
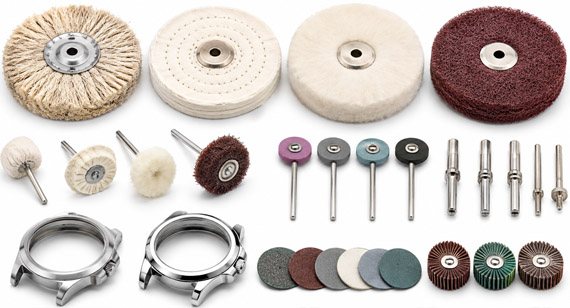
3M publishes abrasive systems for stainless steel grinding, blending, refinement, polishing, and finishes up to highly reflective surface conditions. Menzerna similarly separates stainless steel compounds into heavy-cut, medium-cut, finish, and super-finish stages.
Do Not Select Polishing Compound by Color Alone
Terms such as purple wax, green wax, white wax, blue wax, or orange wax are common shop descriptions, but compound colors are not standardized across all manufacturers.
A better specification includes:
Each compound should have a dedicated wheel or clearly controlled wheel-management system to reduce cross-contamination.
Polishing quality begins with the drawing and finish specification.
Identify Every Finish Zone
The drawing should identify:
Define Polishing Allowance
Polishing removes material. The machining engineer should determine whether an allowance is required on:
Do not apply a general allowance to every feature. Functional bores, threads, gasket grooves, crystal seats, and sealing surfaces may need to be protected rather than polished.
Identify Protected Features
Possible protected areas include:
Define Edge Requirements
The drawing should distinguish between:
The instruction “polish all surfaces” can create costly dimensional and appearance problems.
Approve a Physical Master Sample
A master sample should define:
The master sample should be linked to the approved drawing revision.
| Stage | Main Work | Critical Control |
| 1. Drawing and finish review | Confirm finish zones, boundaries and protected features | Correct revision and approved master sample |
| 2. Pre-polishing inspection | Check dimensions, tool marks, dents and machining defects | Do not polish a dimensionally defective part |
| 3. Cleaning | Remove oil, chips and contaminants | Prevent abrasive contamination |
| 4. Deburring and local correction | Remove burrs and isolated defects | Preserve holes, edges and sealing surfaces |
| 5. Progressive grinding | Remove machining marks and refine the surface | Controlled grit progression and material removal |
| 6. Rough polishing | Remove sanding patterns and establish initial gloss | Heat, pressure, wheel condition and edge control |
| 7. Intermediate polishing | Refine rough-polishing marks | Dedicated wheel and compound |
| 8. Fine or mirror polishing | Develop final gloss and reflection | Avoid waves, haze and rounded transitions |
| 9. Brushing or mixed finishing | Create directional or satin regions | Grain direction, masking and boundary control |
| 10. Cleaning | Remove compound, debris and fingerprints | Holes, threads, cavities and bracelet joints |
| 11. Post-finish inspection | Check dimensions, finish and assembly features | Approved drawing and cosmetic standard |
| 12. Protective packaging | Prevent contact damage | Individual separation and clean materials |
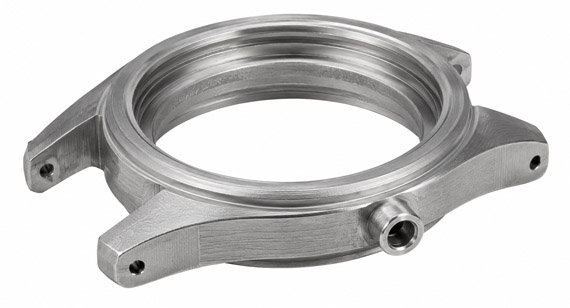
Before polishing begins, the production and finishing teams should confirm:
When the drawing includes mixed finishes, the team should agree on the processing sequence before the first part is finished.
For example:
The exact order may change according to the geometry and finish combination.
Polishing should not begin until the part passes pre-finishing inspection.
Dimensional Checks
Depending on the design, inspect:
Surface Checks
Inspect for:
Polishing cannot reliably correct severe chatter, dimensional errors, deep dents, or unstable geometry. Attempting to remove a deep defect by excessive polishing may produce waves or undersized features.
For a deeper explanation of these machining risks, direct readers to the guide about common CNC watch case machining problems.
Oil, coolant, chips, dust, and handling contamination should be removed before abrasive finishing.
A clean surface helps prevent:
Different cleaning processes may be used according to the material, contamination, and later surface treatment.
Components should also be dried completely before moving to the next process.
Burr removal should be controlled separately from general polishing.
High-risk areas include:
Local defects may be corrected with:
The operator should avoid creating a visible low spot around the repaired area.
Tip: Correct deep machining defects at the machining stage whenever possible. Manual polishing is not a reliable substitute for a stable CNC finishing toolpath.
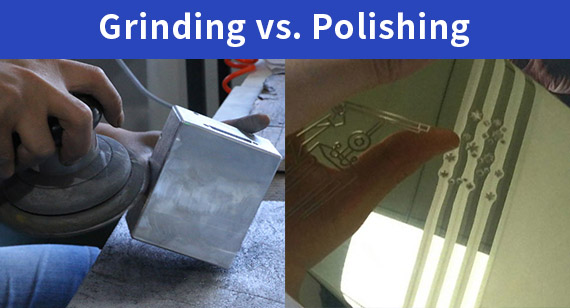
Grinding prepares the surface for polishing by removing CNC tool marks and establishing a consistent abrasive pattern.
The abrasive sequence should move from the coarsest grade required to remove the existing defect toward progressively finer grades.
Skipping too many abrasive stages can leave deep scratches that remain visible after final buffing.
Grinding Controls
A highly reflective final finish depends heavily on the quality of the earlier grinding and refinement stages. 3M’s stainless steel finishing systems likewise use progressive grinding, blending, refinement, and finishing rather than relying on one final wheel.
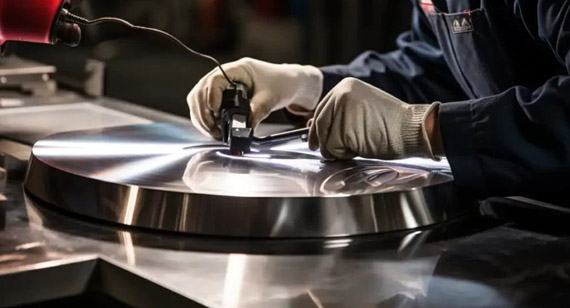
Rough polishing removes the fine grinding pattern and begins developing gloss.
A sisal or other suitable cutting wheel may be combined with a stainless steel cutting compound according to the supplier’s process instructions.
Risks During Rough Polishing
The wheel should contact the part in a controlled direction that reduces the chance of catching an edge or throwing the component.
Each part should be held with a fixture or method that protects the operator and prevents visible clamp or handling marks.
Intermediate polishing removes the patterns left by rough polishing and creates a more uniform gloss.
A stitched cloth wheel or another suitable intermediate wheel may be used with a medium-cut or finishing compound.
The operator should confirm that:
Changing to a finer compound without removing earlier marks will not produce a defect-free final surface.
Fine polishing develops the final reflective appearance.
A soft cotton, loose cloth, or flannel wheel may be used with a fine or super-finish compound suitable for stainless steel.
Menzerna’s official stainless steel product range includes separate compounds for heavy cutting, medium cutting, finishing, and super finishing, with cotton tools specified for selected finish compounds.
Final-Buffing Controls
Continuing to polish after the target appearance is reached increases the risk of edge rounding and dimensional loss.
Directional Brushing
Brushing should follow the direction defined by the drawing or approved sample.
For example:
The operator should not change direction between parts or links.
Mixed Polished and Brushed Finishes
When polished bevels meet brushed faces, masking and processing order become critical.
The finishing plan should prevent:
The boundary should be inspected against a physical sample rather than judged only by a written description.
Bracelet Finish Alignment
Bracelet links should be oriented consistently so the grain direction remains aligned after assembly.
When center and outer links use different finishes, the manufacturer should control:
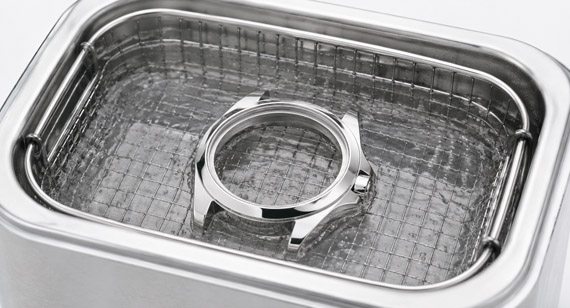
Polishing compound can remain in:
Ultrasonic or another validated cleaning method may be used to remove residues.
Cleaning should be followed by:
The current VMT article already recognizes ultrasonic cleaning as an important post-polishing stage, but the revised page should connect it to assembly cleanliness and cosmetic acceptance rather than presenting it as an isolated step.
Polishing inspection should include both dimensional and visual requirements.
Post-Polishing Dimensional Inspection
Depending on the drawing, recheck:
Possible equipment includes:
VMT’s watch-case page identifies CMM, optical measurement, height gauges, roughness testers, micrometers, first-article inspection, in-process inspection, surface-finish inspection, final inspection, and outgoing inspection as part of its quality-control approach.
Cosmetic Inspection
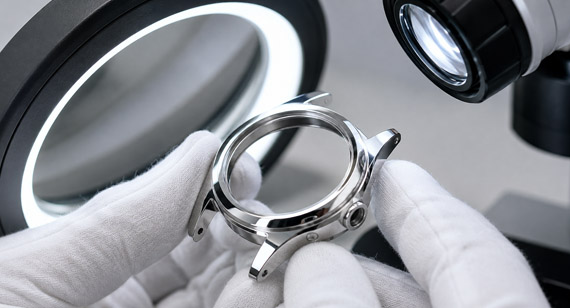
Cosmetic inspection should define:
Inspect for:
The acceptance standard should be agreed before batch production.
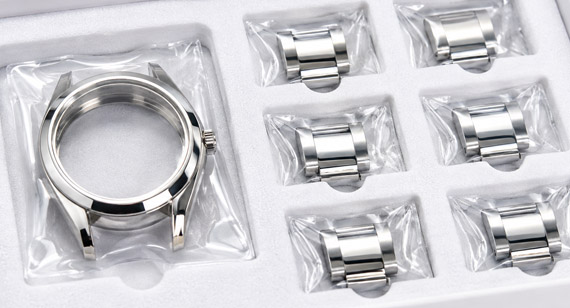
A polished component can pass final inspection and still be rejected after shipment if the packaging allows metal-to-metal contact.
Watch cases and bracelet components should be:
Protective films, sleeves, trays, foam, bags, or dividers may be selected according to the finish and geometry.
VMT’s watch-case and quality-control pages identify surface-finish inspection and protective packaging as part of the final production process.
| Defect | Likely Cause | Customer Risk | Recommended Control |
| Residual deep scratches | Abrasive sequence advanced too quickly | Rejection under cosmetic inspection | Return to the correct abrasive stage |
| Polishing waves | Uneven pressure or excessive local polishing | Distorted mirror reflection | Use stable support and controlled movement |
| Rounded bevels | Too much pressure or time near an edge | Loss of premium geometry | Define bevel width and polishing allowance |
| Uneven chamfer width | Inconsistent manual material removal | Visible asymmetry | Inspect chamfer width before and after polishing |
| Haze or cloudiness | Contaminated wheel, wrong compound, incomplete refinement | Poor mirror appearance | Use dedicated clean wheels and correct sequence |
| Fine swirl marks | Final wheel or compound is too aggressive or contaminated | Visible marks under angled light | Use a validated fine-finishing combination |
| Burn or heat discoloration | Excessive pressure, speed, or contact time | Surface damage and rework | Reduce heat and allow cooling |
| Embedded compound | Incomplete cleaning | Assembly contamination and cosmetic rejection | Validate ultrasonic cleaning and rinsing |
| Grain-direction variation | Links or cases processed in different orientations | Batch inconsistency | Use orientation fixtures and reference samples |
| Wavy finish boundary | Poor masking or uncontrolled hand finishing | Uneven polished-to-brushed transition | Define masking and boundary-inspection method |
| Over-polished sealing surface | Functional area was not protected | Gasket or case-back fit risk | Mask or exclude the surface from polishing |
| Thread contamination | Compound or abrasive enters threads | Tight or damaged assembly | Protect, clean and gauge the thread afterward |
| Bracelet assembly scratches | Links contact during assembly | Finished bracelet rejection | Use protected assembly fixtures and handling controls |
| Batch gloss variation | Different wheels, compounds, operators or process time | Parts do not visually match | Lock the process and compare with a master sample |
Polishing removes material, but the amount removed is not always uniform.
More material may be removed from:
Less material may be removed from:
This can affect:
Practical Tolerance-Control Strategy
Note: Do not assume a nominal polishing allowance applies equally to every geometry. The correct allowance should be validated through prototypes or first-article parts.
| Process | Main Purpose | Surface Effect | Important Consideration |
| Mechanical polishing | Remove scratches and refine appearance | Smooth, bright, or mirror-like | Removes material and may change geometry |
| Brushing | Create directional texture | Linear matte or satin appearance | Direction and consistency must be controlled |
| Bead blasting | Create uniform matte texture | Diffuse, non-directional appearance | Media and masking affect the result |
| Passivation | Improve the condition of the stainless steel passive surface | Usually limited cosmetic change | Requires appropriate cleaning and process specification |
| Electropolishing | Electrochemically removes a controlled surface layer | Smoother and brighter surface | Can change dimensions and edge condition |
| PVD coating | Add a decorative or functional thin film | Colored or metallic coated appearance | The underlying surface preparation remains important |
These processes may be combined, but the correct sequence depends on the design, material, required appearance, and functional features.
For broader process information, guide readers to VMT’s steel surface finishing and CNC machining surface finishing pages.
One approved prototype does not guarantee repeatable mass production.
A production finish requires controlled:
First-Article Finish Approval
Before full production, approve:
In-Process Inspection
During production, monitor:
Final Inspection
The final inspection should confirm:
VMT’s published quality-control process includes incoming checks, first-article inspection, in-process inspection, surface-treatment control, appearance inspection, full inspection, records, and packaging verification.
Polishing cost depends on more than the overall size of the case.
Starting Surface Quality
Deep tool marks, chatter, dents, and inconsistent machining require more grinding and manual correction.
A stable fine-machined surface can reduce:
Geometry
Cost increases with:
Finish Type
A uniform brushed finish is generally easier to control than:
Cosmetic Standard
Cost is affected by:
Order Quantity
Prototype polishing has a higher unit cost because process setup, masking trials, sample approval, and inspection are divided across fewer parts.
Batch production may reduce unit cost, but it requires:
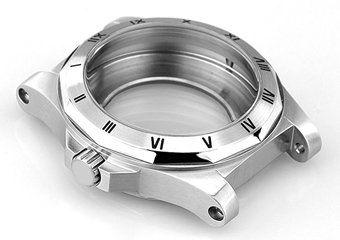
Project Background
A watch brand required a 316L stainless steel case and matching bracelet with:
Project Challenges
The main risks included:
VMT Solution
The process plan included:
Result
The approved prototype established the machining allowance, finish sequence, inspection method, and master appearance standard used for the pilot batch.
The project demonstrates that mixed watch finishes require coordination between machining, polishing, masking, cleaning, assembly, inspection, and packaging.
VMT supports custom watch projects from DFM and CNC machining through polishing, brushing, PVD coordination, inspection, and protective packaging.
Engineering and Finish Review
Before production, VMT can review:
CNC Machining Before Polishing
The machining process can be optimized to reduce:
A controlled machined surface improves the stability of the later finish.
Prototype Finish Validation
Prototype support allows you to approve:
Surface-Finishing Coordination
Depending on your drawing and material, VMT can coordinate:
Dimensional and Cosmetic Inspection
Inspection can combine:
Prototype-to-Production Support
After approval, the process can be transferred to pilot and batch production through controlled drawings, fixtures, abrasive systems, finish samples, inspection methods, and protective packaging.
VMT’s watch-case service page states that it supports 304, 316L, and 904L stainless steel, polishing, brushing, PVD, passivation, electropolishing, DFM, prototype manufacturing, surface-finish inspection, and production quality control.
A premium stainless steel watch case finish begins before the polishing wheel touches the part. Material selection, CNC surface quality, machining allowance, finish boundaries, edge requirements, cleaning, inspection, and packaging all affect the final result.
Upload your 2D drawings and 3D models to request a quotation and DFM review. VMT can help you evaluate stainless steel selection, CNC machining, polishing allowance, mirror and brushed finishes, protected features, PVD preparation, dimensional inspection, cosmetic acceptance, and prototype-to-production consistency.
Send your watch case and bracelet drawings for a custom quotation and surface-finishing review.
Send your 2D drawing, 3D model, stainless steel grade, finish map, brushing direction, critical dimensions, reference sample, prototype quantity, production quantity and PVD or passivation requirements. VMT will review the CNC machining, polishing allowance, protected features, inspection and batch-consistency requirements.
All information and uploaded files are secure and confidential.
1 Tell us what you need
2 Get solution & quote
3 Approve production
Email: inquiry@vimetal.com.cn
How is a stainless steel watch case mirror polished?
A mirror-polishing process normally includes surface inspection, cleaning, progressive grinding, rough polishing, intermediate polishing, fine buffing, cleaning, and final inspection.
The exact abrasive and compound sequence depends on the stainless steel grade, starting surface, geometry, and approved finish.
What tools are used to polish stainless steel watch cases?
Common tools include abrasive belts, discs, stones, nonwoven wheels, sisal wheels, stitched cloth wheels, cotton wheels, flannel wheels, felt points, and stainless steel polishing compounds.
Each tool should be selected for a specific cutting or finishing stage.
Is polishing the same as buffing?
The terms are sometimes used interchangeably, but polishing generally includes material refinement with abrasives, while buffing often refers to the later gloss-development stages using softer wheels and finer compounds.
The supplier should define the actual process rather than relying only on terminology.
Does polishing change watch case dimensions?
Yes. Polishing removes material and can reduce local dimensions, round edges, change chamfer width, or affect flatness.
Critical fits, threads, gasket grooves, and sealing surfaces should be protected or inspected after polishing.
How do you prevent rounded edges during polishing?
Define the required edge on the drawing, leave an appropriate machining allowance where necessary, use controlled wheel contact, reduce polishing time near the edge, and inspect the first finished part before batch production.
Why does a mirror-polished watch case look wavy?
Waves can result from uneven pressure, excessive local polishing, poor surface preparation, unstable support, or attempts to remove deep defects manually.
The machining and grinding stages should create a stable surface before mirror buffing begins.
How are polished and brushed surfaces combined?
One finish is completed first, protected with suitable masking, and followed by the second process.
The sequence depends on the case geometry. The transition line, brushing direction, and finish appearance should be controlled using a drawing and approved physical sample.
Can polishing remove all CNC machining marks?
Fine machining marks can normally be refined through a suitable abrasive sequence, but deep chatter, dents, or dimensional defects should be corrected during CNC machining.
Removing severe defects only by polishing can create waves and dimensional loss.
Why do bracelet links have different brushing directions?
This usually results from inconsistent part orientation, operator technique, or assembly sequence.
Orientation fixtures, approved samples, and inspection before assembly help maintain a consistent grain direction.
Should watch cases be polished before PVD?
The required surface should be prepared before PVD because scratches, waves, and texture differences may remain visible through the coating.
The correct preparation may be mirror polishing, brushing, blasting, or another approved texture.
How are polished watch cases inspected?
Inspection may include dimensional measurement, surface-roughness testing, functional assembly, controlled-light visual inspection, and comparison with an approved master sample.
The customer should define critical surfaces and cosmetic acceptance requirements.
Can a polished watch case be passivated?
Mechanical polishing and passivation may be combined when appropriate for the material and product specification.
The process sequence and cleaning requirements should be confirmed with the finishing supplier.
What causes polishing compound residue inside a watch case?
Residue can remain in threads, holes, grooves, engraving, and internal cavities when cleaning is incomplete.
A validated cleaning, rinsing, drying, and final-inspection process is required.
How can scratches be prevented after polishing?
Use clean gloves, protected trays, individual separation, controlled assembly fixtures, clean inspection surfaces, and packaging that prevents metal-to-metal contact.
What files are needed for a polishing quotation?
Provide:


 +86 15099911516




 Read more