16 years one-stop China custom CNC machining parts factory

Hey there I’m VMT Sam!
With 25 years of CNC machining experience we are committed to helping clients overcome 10000 complex part-processing challenges all to contribute to a better life through intelligent manufacturing. Contact us now
 607 |
Published by VMT at Sep 14 2026 | Reading Time:About 6 minutes
607 |
Published by VMT at Sep 14 2026 | Reading Time:About 6 minutes


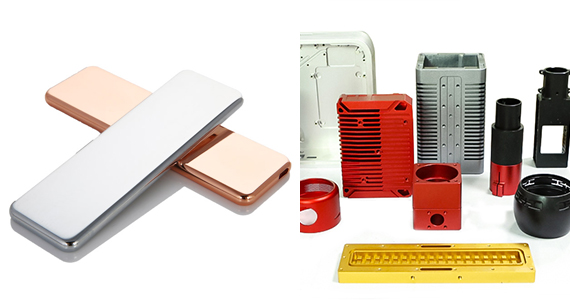
When designing or sourcing custom aluminum parts, anodizing is often the go-to surface treatment for corrosion resistance, enhanced hardness, and premium visual appeal. However, you may face a common challenge: unpredictable anodizing costs that exceed the final product budget.
The cost of aluminum anodizing is rarely a simple "per-square-foot" figure. It fluctuates based on finish types, coating thickness, alloy grades, manual masking requirements, and racking complexity. Understanding these variables is key to controlling your manufacturing overhead without compromising on quality.
In this comprehensive guide, we break down the 8 critical cost drivers in aluminum anodizing, provide a real-world pricing comparison matrix, and share actionable Design for Anodizing (DFA) tips to help you reduce your per-unit finishing costs. At the end, we will also share a case study of how we helped a client reduce anodizing costs for aluminum electronics housing parts by 28%.
Quick Summary: Average Aluminum Anodizing Cost Ranges
The specific anodizing process you request directly influences the energy consumption, chemical bath setup, and processing time required, making it one of the largest variables in your overall finishing quote.
Type I (Chromic Acid Anodizing): Used primarily in aerospace applications where part fatigue strength must be preserved. Because chromic acid requires specialized hazardous waste disposal and environmental compliance, Type I often carries a premium due to high environmental and regulatory overhead.
Type II (Sulfuric Acid Anodizing): The most common, versatile, and economical anodizing method. Operating at ambient temperatures (around 68°F / 20°C) with moderate voltage, Type II offers fast cycle times and low energy costs, making it the standard benchmark for cost-effective finishing.
Type III (Hardcoat Anodizing): Designed for extreme wear resistance and heavy industrial applications. Type III runs at sub-freezing bath temperatures (around 32°F–50°F / 0°C–10°C) and requires significantly higher current density. The need for continuous refrigeration, higher electricity consumption, and longer immersion times causes Type III to cost 20% to 50% more than Type II.
| Anodizing Type | Typical Thickness | Energy and Bath Needs | Relative Cost Level | Primary Application |
| Type I (Chromic) | 0.00002" – 0.0003" | Hazardous chemistry handling | Moderate – High($$) | Aerospace, thin-walled precision parts |
| Type II (Sulfuric) | 0.0002" – 0.001" | Standard ambient temperature | Standard ($) | Consumer electronics, decorative, general CNC parts |
| Type III (Hardcoat) | 0.001" – 0.003" | High voltage + refrigeration | Premium ($$–$$$) | Wear-resistant industrial, military, automotive |
How to Select the Right Type Without Overpaying
Default to Type II for General Purpose: Unless your part is subjected to continuous abrasion, outdoor marine friction, or aerospace compliance, Type II clear or dyed anodizing provides ample corrosion protection at the lowest price point.
Avoid "Over-Specifying" Hardcoat: Do not request Type III simply for cosmetic durability or general outdoor exposure. Reserve Type III strictly for mating components, sliding surfaces, or heavy mechanical wear environments.
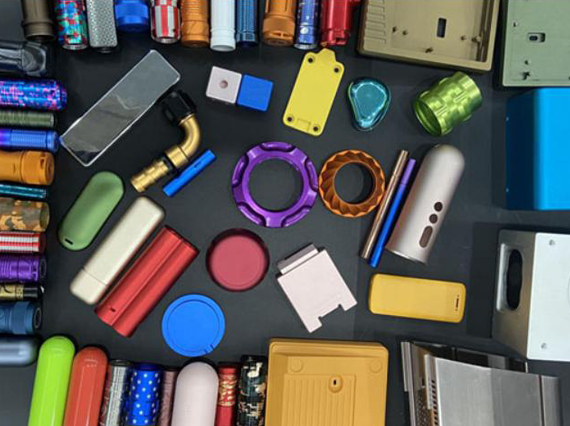
Anodizing is an electrochemical conversion process, meaning cost scales proportionally with total surface area and the strictness of thickness tolerances.
How Surface Area and Tight Thickness Tolerances Drive Up Prices
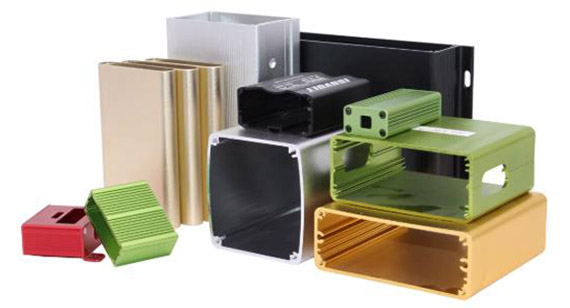
Surface Area Math: Finishing shops calculate chemical consumption and electric current density based on total square inches/feet. Large industrial plates or intricate, multi-featured enclosures require greater amperage and larger bath space, automatically raising the unit cost.
The Cost of Tight Thickness Tolerances: Standard commercial anodizing allows for a moderate tolerance band (e.g., ±0.0002" or ±5 microns). If your engineering drawing demands ultra-tight tolerances (e.g., ±0.00005"), technicians must perform frequent bath chemistry monitoring, and run sample test coupons, and this manual labor significantly increase the quote.
Dimensional Growth Considerations: Anodizing penetrates the metal while simultaneously building up on the surface (typically a 50/50 split of growth vs. penetration for Type III). Failing to account for this growth on tight CNC threads or precision bearing bores can lead to costly post-machining salvage operations.
Standardizing Thickness Specs for Cost Savings
Use Standard Commercial Specs: Specify broad thickness ranges whenever possible (e.g., MIL-A-8625 Type II Class 1, 0.0003"–0.0007"). Giving the finishing shop room to operate speeds up production throughput and lowers cost.
Isolate Precision Features: If only a few critical pin holes or bearing journals require exact tolerances, indicate on the drawing that those features can be reamed post-anodize or require light masking, rather than forcing the entire part into a tight-tolerance anodizing spec.
Understanding how anodizing facilities structure their pricing empowers you to optimize your purchasing schedules and dramatically lower unit costs.
Understanding Fixed Setup Costs vs. Variable Per-Piece Costs
Anodizing suppliers operate around fixed lot charges (often called minimum shop fees or setup fees, typically ranging from $80 to $200 per run). This fee covers fixed labor costs, including:
For example, for ordering 5 prototype parts, the entire $150 lot charge is amortized across those 5 pieces, resulting in a steep $30.00 per-piece anodizing cost. But for 500 parts, that same setup fee translates to just $0.30 per piece, plus nominal chemical consumption charges.
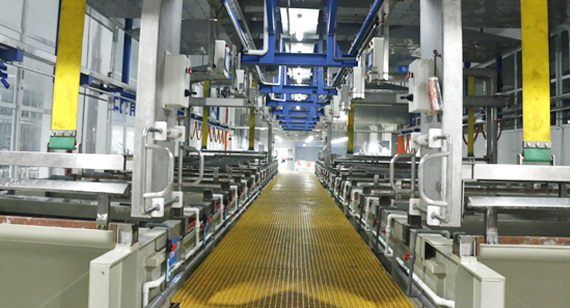
Optimal Batch Sizes to Maximize Rack Capacity
Consolidate Purchase Orders: Combine small recurring orders into larger quarterly or bi-annual production batches to avoid paying the minimum lot fee multiple times.
Design Around Rack Capacity: Finishing lines process parts on copper or titanium racking trees. Ask your supplier about their standard rack capacity for your part size. Increasing your order quantity from 180 pieces to 200 pieces might fit onto the exact same rack load, effectively finishing those extra 20 parts at no additional setup charge.
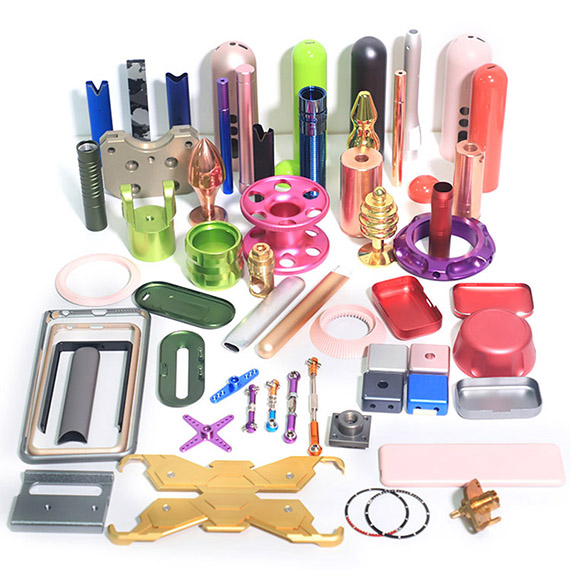
Color anodizing adds aesthetic value and brand identification, but the cost depends heavily on whether your chosen shade utilizes an in-house dye bath (common colors that the factory kept for long time) or requires a custom-formulated specialty solution for uncommon custom colors.
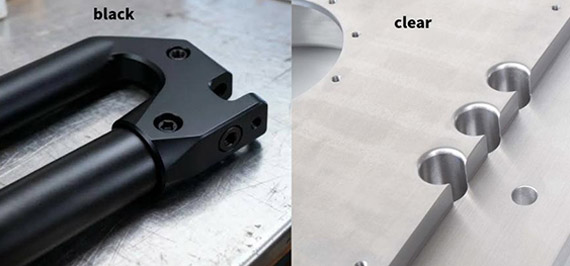
Standard Active Baths (Clear and Black)
Lowest Cost: Kept running continuously in almost every shop, making them the cheapest and fastest options.
Common In-House Colors (Red, Blue, Gold, Green)
Moderate Cost: Most factories keep standard primary color tanks permanently set up, adding only a minor premium over clear or black.
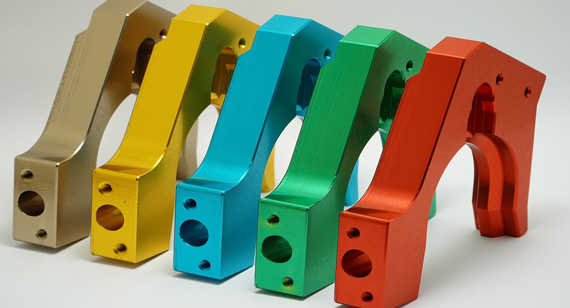
Custom Colors (Muted Tones, Custom Pantones)
Premium Cost: Uncommon shades (like dusty pink, muted gray, or exact Pantone matches) require setting up a dedicated bath, manual color testing, and high chemical cleanup costs.
UV Stability
High-grade outdoor dyes with UV resistance cost more than standard indoor-grade options.
How to Manage Color Costs for Aluminum Anodizing
Check the Supplier's Color Catalog First: Before fixing a custom Pantone shade on your drawing, ask your anodizing supplier for their standard active colors or shades they have previously processed. This could be possible for you to save color-matching fees.
Use Clear or Black for Budget-Sensitive Parts: For functional or hidden components, specify standard clear (Class 1) or black (Class 2) to leverage high-volume production lines.
Complex shapes take more time and manual care, increasing costs.
Design for Anodizing (DFA) Best Practices
Add Drainage and Vent Holes: Design small vent or drain holes at the bottom of deep pockets or blind holes. This lets trapped air escape quickly and allows chemicals to drain freely during rack transfers.
Relax Threaded Hole Specs: Unless internal threads strictly need corrosion protection, note on your drawing that tight-tolerance blind threads do not require a uniform anodized layer to avoid fit issues and extra processing.
Every part must be physically clamped onto a conductive rack to pass through the anodizing tanks. Racking is one of the most labor-intensive parts of the process.
Manual Loading Labor and Rack Density: Securing parts onto rack fingers one by one takes time. When a part's shape limits how many pieces can fit on a single rack (low rack density), the labor and tank space cost per part goes up significantly.
Custom Fixture Expenses: Standard universal racks work for most parts. However, oversized, heavy, or oddly shaped parts require custom-built fixtures, adding extra tooling and setup costs.
Managing Rack Marks: Electrical contact points leave tiny un-anodized marks ("rack marks") where the clamp grips the metal. If the drawing specifies zero visible rack marks on all surfaces, technicians must spend extra time finding hidden internal mounting points or using specialized threaded contact pins.
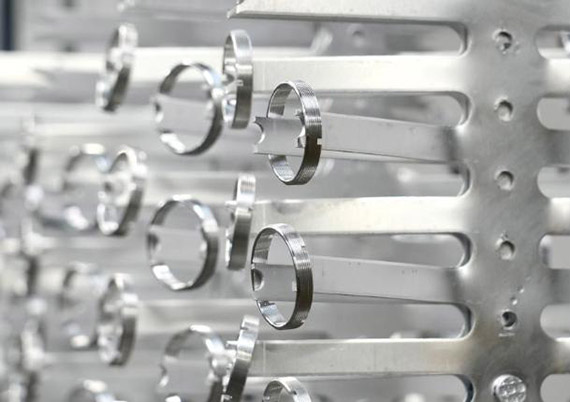
Designing Built-In Racking Points on Your Anodized Aluminum Parts
Allow Rack Marks in Non-Critical Areas: Mark acceptable contact locations on your drawing (such as an internal hole or hidden face). This lets the factory use fast, standard racking methods without manual troubleshooting.
Design for Higher Rack Density: Adding a simple threaded hole or blind mounting tab on a hidden face allows technicians to mount parts directly onto reusable posts. This maximizes how many parts fit on one rack and speeds up loading.
Extra prep work like sandblasting or polishing, protective masking, and special packaging after finishing can increase your total finishing bill.
Surface Pre-Treatments (Sandblasting and Polishing): Bead blasting can achieve a uniform matte finish while polishing can achieve a glossy look for aluminum machined components. Anodizing does not hide surface scratches, and bead blasting and polishing are the common pre-treatment methods to finish the unperfect as-machined aluminum parts which also increasingly increases the total finishing fees.
Precision Masking: For certain areas like conductive grounding spots, tight bearing bores, or threaded holes must stay bare metal, technicians will manually apply high-temperature tape, liquid plugs, or silicone stoppers. Applying and removing maskants by hand acounts for the cost fees.
Special Sealing and Packaging: High-performance seals (for maximum corrosion or chemical resistance) require longer immersion cycles. Additionally, when cosmetic anodized parts require individual bubble wrapping or custom foam trays to prevent scratching during shipping, fees will increase.
Control the Pre- and Post-Treatment Requirements
Partner with High-Quality CNC Machine Shops: Partnering with a reliable machine shop that produces clean, scratch-free parts allows you to send parts directly from machining to anodizing (As-Machined Finish). This saves the need for extra bead blasting or polishing.
Limit Masking to Critical Features: Avoid blanket masking notes on your drawings. Only mask features where bare metal is essential for electrical conductivity or ultra-precise mechanical fits.
Not all aluminum alloys react the same way to anodizing. The alloying elements inside the metal (like zinc, copper, or silicon) directly affect bath processing time, color clarity, and rejection risks.
Common 6xxx Alloys (6061, 6063) : Lowest Cost and Best Quality
6000-series alloys are the absolute best choice for anodizing. They process quickly, produce a clean and consistent oxide layer, and accept color dyes evenly with minimal risk of rework.
High-Strength Alloys (7075, 2024) : Moderate Cost and Darker Finish
High-strength alloys contain significant amounts of zinc or copper. They take longer to process, often result in a slightly darker or duller anodized finish, and carry higher potential rework costs due to stricter bath parameter controls.
Cast Aluminum Alloys (A380, A356) : Highest Cost and Not Recommended
Castings contain high silicon contents and internal porosity. They take dye very poorly, often turn out blotchy or dull gray, and trap chemicals inside tiny surface pores. Finishing cast aluminum carries a high rejection rate, making it the most expensive and least reliable choice for anodizing.
Choosing Anodizing-Friendly Alloys
Default to 6061 or 6063: Whenever structural requirements allow, choose 6061 or 6063 aluminum. They offer the best balance of machinability, low cost, excellent surface appearance, and virtually zero rework risk.
Use 7075 or 2024 When High Strength Is Required: If your application demands higher tensile strength, specify 7075 or 2024, but account for a slightly darker finish and potential rework overhead in your budget.
Avoid Cast Aluminum for Cosmetic Anodizing: Do not select cast aluminum if an anodized finish is required. If a casting must be surface-treated, consider powder coating or wet painting instead.
The table below illustrates how different material grades, processing types, secondary operations, and batch sizes combine to impact overall finishing costs, using relative cost levels ($ to $$$$) for your referances:
| Part Scenario | Aluminum Grade | Anodizing Type | Pre-Treatment & Masking | Color & Order Volume | Relative Cost Level |
| High-Volume Budget Part | 6061 / 6063 | Type II (Standard) | As-Machined (No Sandblasting) / No Masking | Clear or Black / High Volume (>500 pcs) | $ |
| Standard Cosmetic Part | 6061 | Type II (Standard) | Light Sandblasting (Matte) / No Masking | Standard Colors (Red/Blue/Gold) / Mid Volume | $$ |
| Structural Part (With Grounding) | 6061 | Type II (Standard) | As-Machined / Selective Manual Masking (Grounding spots) | Clear / Mid Volume | $$$ |
| High-Strength Prototype | 7075 | Type II (Standard) | As-Machined / No Masking | Custom Pantone Color / Low Volume (<20 pcs) | $$$ |
| Wear-Resistant Industrial Part | 6061 | Type III (Hardcoat) | As-Machined / No Masking | Natural (Dark Gray) / Mid Volume | $$$ |
| Precision Aerospace Component | 7075 / 2024 | Type III (Hardcoat) | Selective Sandblasting / Multi-Zone Precision Masking + Tight Tolerances | Natural / Low Volume (<50 pcs) | $$$$ |
How We Helped a Client Reduce Anodizing Costs by 28% for Aluminum Electronics Housings
An industrial electronics manufacturer approached us to optimize the surface finishing costs for their custom CNC-machined 7075 aluminum enclosures. While the client required high-strength 7075 alloy and a proprietary custom-matched anodizing color for brand identification, their unit finishing costs were inflated by heavy manual labor, pre-treatment steps, and inefficient order scheduling.
During our Design for Anodizing (DFA) review, we focused on cost-reduction opportunities that preserved the client's strict material and cosmetic requirements. First, we addressed the pre-treatment phase. By improving cutting parameters in our CNC machining process, we produced smooth, scratch-free surfaces straight off the mill (As-Machined Finish). This allowed the client to eliminate optional pre-anodize bead blasting, saving both processing time and labor expenses.
Second, we streamlined the manual masking and racking procedures. The original engineering print specified blanket masking across all internal threaded holes and deep recesses. We collaborated with the client's design team to limit masking strictly to critical electrical grounding pads. For the remaining features, we designed custom-threaded mounting points on hidden faces, allowing technicians to screw parts directly onto reusable rack posts. This eliminated manual tape application while increasing single-rack capacity by 35%.
Finally, we optimized the order structure without altering the client's custom color formula. Instead of placing small, fragmented weekly orders that triggered recurring minimum lot setup charges, the client consolidated purchasing into predictable bi-weekly production batches. By maximizing rack density, eliminating pre-treatment labor, and reducing manual masking time, we successfully reduced their total anodizing cost by 28% while maintaining 100% of their original material and custom color specifications.
Anodizing is one of the most effective surface treatments for improving corrosion resistance, surface hardness, and visual appeal in custom aluminum components. However, achieving the best finish does not mean paying premium prices.
As demonstrated throughout this guide, total anodizing costs are driven by a combination of engineering decisions and order management, including process selection (Type II vs. Type III), coating tolerances, batch sizes, part geometry, and secondary masking requirements. By applying Design for Anodizing (DFA) principles, avoiding unnecessary tight tolerances, and coordinating rack density with your supplier early in the design stage, you can significantly reduce unit finishing costs without sacrificing product performance.
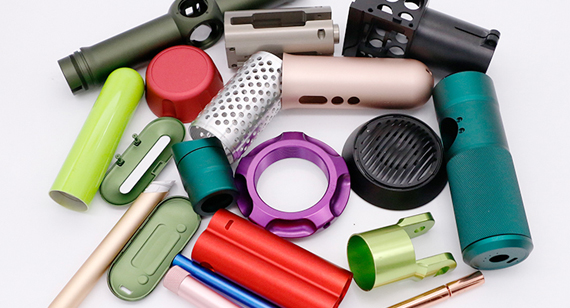
Partner with VMT for Cost-Effective Anodizing Solutions
At VMT, we provide end-to-end CNC machining and custom aluminum anodizing services tailored to your exact project requirements. Our engineering team conducts comprehensive Design for Manufacturability (DFM) and DFA reviews on every project to help you identify cost-saving opportunities before production begins.
Whether you need high-volume Type II clear components, high-wear Type III hardcoat parts, or custom-matched cosmetic finishes, VMT offers:
Send your 2D drawings, 3D CAD models, aluminum grade, anodizing type, coating thickness, color, masking requirements, cosmetic requirements, prototype quantity and production quantity. VMT will review manufacturability, DFA, rack strategy, dimensional allowance and quotation requirements.
All information and uploaded files are secure and confidential.
1 Tell us what you need
2 Get solution & quote
3 Approve production
Email: inquiry@vimetal.com.cn
1. Does anodizing change the tight dimensions of precision CNC parts?
Yes. Type II anodizing typically adds 0.0002" to 0.0008" (5–20 µm) to total surface dimensions (half growth, half penetration). Type III hardcoat adds 0.001" to 0.002" (25–50 µm). For high-precision bearing bores or threaded holes, always specify pre-anodize machining tolerances or request local masking on your engineering drawings to prevent post-process fit issues.
2. Is Type III hardcoat anodizing always more expensive than Type II?
Yes. Type III hardcoat is typically 30% to 50% more expensive than standard Type II anodizing. Hardcoat requires sub-freezing bath temperatures (around 32°F / 0°C), significantly higher electrical voltage, and longer immersion cycles, which drastically increases factory power consumption and refrigeration costs.
3. Why do small anodizing orders have such high per-piece prices?
Anodizing facilities charge a minimum lot fee (setup charge) per chemical bath setup, regardless of whether you process 5 parts or 100 parts. On small production runs, this fixed setup cost is divided among very few units. Consolidating small batches into larger orders amortizes the lot fee, dropping your per-unit cost significantly.
4. Can anodizing hide surface scratches, tool marks, or chatter on raw aluminum?
No. Anodizing is an electrochemical conversion process, not a thick coating like powder painting. It mimics the underlying surface texture and often accentuates raw machine marks or surface scratches. If a pristine cosmetic surface is required, you must specify pre-treatments like bead blasting or polishing—or partner with a CNC machine shop that produces clean, scratch-free As-Machined finishes.
5. What is the most cost-effective color for anodized aluminum components?
Standard Clear (Natural) and Black are the most economical color choices. Finishing shops run clear and black tanks continuously, eliminating custom bath setup and chemical blending fees. Secondary active colors (standard red, blue, or gold) carry a minor premium, while custom Pantone color matching is the most expensive option.
6. Can cast aluminum parts be anodized cost-effectively?
While cast aluminum (such as A380 or A356) can technically be anodized, it is not recommended for cosmetic components and carries high processing costs. Cast alloys contain high silicon content and internal porosity, which causes uneven dye absorption, blotchy finishes, and high acid-trapping risks. For cast components needing a surface finish, powder coating or wet painting is usually much more cost-effective.
The technical information and manufacturing advice shared on the VMT website are for general guidance only. While we strive for accuracy, VMT does not guarantee that the processes, tolerances, or material properties mentioned are applicable to every specific project. Any reliance you place on such information is strictly at your own risk. It is the buyer's responsibility to provide definitive engineering specifications for any production orders. Final specifications and service terms shall be subject to the formal contract or quotation confirmed by both parties.


 +86 15099911516




 Read more