15 years one-stop China custom CNC machining parts factory
 167 |
Published by VMT at Jan 02 2025 | Reading Time:About 6 minutes
Are you frustrated with cracking, melting, or poor finishing results when attempting to machine acrylic (PMMA) in your workshop? Many manufacturers face challenges like melting edges, rough cuts, or surface blemishes due to improper parameters, tooling, or design setups. These setbacks not only cause material waste and higher costs but can also damage your reputation for quality. Fortunately, by mastering CNC acrylic machining parts techniques—including feed rates, spindle speeds, and clever fixture design—you can achieve glossy finishes, tight tolerances, and minimal part rejections. This comprehensive guide reveals how PMMA CNC machining parts excel when you optimize the entire process, from tool selection and workholding to post-machining polishing. Equip your CNC machining factory with the insights to confidently tackle custom CNC machining of acrylic, deliver impeccable clarity, and delight your customers with pristine, robust acrylic components.
For CNC acrylic machining parts, use sharp carbide cutters with moderate feed rates to prevent melting and chipping. Set optimal spindle speeds (8,000–15,000 rpm) and apply effective coolants or air blasts to dissipate heat. Securing workpieces firmly with a stable CNC machining fixture design further enhances cut quality and prevents distortion, ensuring polished, dimensionally accurate PMMA components.
Before diving into detailed processes and best practices, let’s understand acrylic’s fundamental characteristics and why it stands out as a popular choice for CNC machining manufacturing. By grasping its properties and potential pitfalls, you can tailor your custom CNC machining approach to yield high-quality, transparent PMMA parts with excellent durability and aesthetics.
Foreword
Acrylic, often referred to by its chemical name PMMA (polymethyl methacrylate), has grown in popularity for its optical clarity, lightweight structure, and high impact resistance. As the demand for transparent plastic components expands—spanning industries like automotive, retail, medical, and electronics—manufacturers increasingly rely on CNC machining services to shape acrylic into precise, dimensionally stable forms. For CNC machining parts that require transparency, weather resistance, and versatility, acrylic frequently rivals or surpasses glass and polycarbonate, thanks to its impressive balance of clarity, hardness, and formability.
From conceptual CNC prototype machining to large production runs, acrylic’s unique attributes present both opportunities and challenges in the machine shop. On one hand, its softness and low melting temperature can complicate tool engagement, risking thermal deformation or chip welding if settings are imbalanced. On the other, acrylic’s ease of polishing and compatibility with different fabrication methods (like laser cutting or milling) offer designers a flexible medium for complex shapes. By strategically planning processes and optimizing fixture setups, machinists can harness acrylic’s benefits—creating robust, transparent, and aesthetically appealing parts for numerous applications.
In this comprehensive guide, we’ll cover the basics of acrylic’s composition, highlight best practices for CNC machining factory workflows, and explore advanced methods for finishing and post-processing. By understanding the fundamentals of CNC acrylic machining parts, you can produce PMMA components with high clarity, minimal defects, and consistent performance.
Acrylic is a thermoplastic polymer known for its exceptional optical clarity and hardness, commonly recognized under brand names like Plexiglas, Lucite, or Perspex. Chemically, it’s PMMA (polymethyl methacrylate), formed through the polymerization of methyl methacrylate monomers. This plastic stands out for its glass-like transparency, typically allowing up to 92% light transmission. Unlike glass, however, acrylic is roughly half the weight, making it simpler to machine, handle, and transport.
Apart from clarity, acrylic’s popularity arises from its balanced mechanical properties. It’s stiffer than many engineering plastics, offering better scratch resistance and dimensional stability over time. Acrylic also responds well to finishing processes: edges can be flame-polished for a crystal-clear look, surface marks can be buffed out, and it’s easier to bond using specialized adhesives compared to certain other plastics. In CNC machining parts contexts, engineers leverage these traits to create displays, protective covers, lighting fixtures, and more.
Despite these perks, acrylic’s relatively low melting temperature around 160°C can pose issues if machining speeds and feeds aren’t managed carefully. Excess friction can lead to melting or distortion, compromising surface finish. Additionally, direct contact with certain solvents can cause stress cracking, emphasizing the need for correct coolant usage or cleaning agents in a CNC machining factory environment. By respecting acrylic’s temperature sensitivity and chemical interactions, you can consistently achieve top-tier results in custom CNC machining settings.
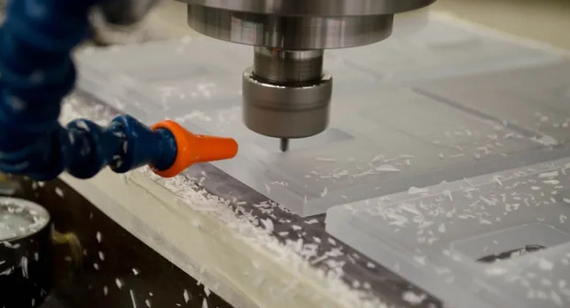
Acrylic strikes a middle ground when it comes to machinability—being neither as tough as polycarbonate nor as brittle as glass. Generally, machinists find PMMA forgiving if approached with the right parameters, thanks to its relatively soft hardness and modest cutting forces. Tools do not necessarily require excessive torque, reducing stress on machines and simplifying clamp setups.
Despite acrylic’s plastic nature, a few challenges arise. Its relatively low melting point means operators must watch out for heat buildup, especially at higher spindle speeds or deeper tool engagement. Overheating the edges can lead to “gummy” swarf, smudged surfaces, and potential re-welded chips along the cut line. Additionally, sharp cutting edges are essential; dull tools can cause rough edges, chatter marks, or stress cracks in the acrylic. Another issue is micro-chipping if the tool feed is overly aggressive or if the part lacks sturdy support from the fixture.
Because of these factors, running thorough test cuts for new acrylic designs is wise in CNC prototype machining phases. Machinists fine-tune feed rates, speeds, and pass depths to minimize friction-induced scorching or edge splitting. With refined settings, acrylic milling or turning can proceed smoothly, generating minimal burrs that can be easily polished away. Moreover, finishing steps like flame or vapor polishing can remove micro-scratches, restoring optical clarity to any slightly marred edges. Overall, by balancing speed, feed, and adequate cooling or air blasts, acrylic becomes a readily workable material, delivering visually impressive CNC machining parts with stable performance.
What Is the Color of CNC Acrylic Resin?
Acrylic resin is typically transparent or clear, though variants exist in a rainbow of opaque or translucent shades. Clear PMMA stands out for its near colorless profile, rivaling glass in optical clarity. When pigmented, acrylic can maintain vibrant, consistent coloration without bleaching under typical usage. This color stability and weather resistance make it invaluable for signage, displays, and external architectural elements. In custom CNC machining, clear acrylic is frequently used where transparency or see-through features are essential—such as machine guards or optical test equipment housings.
Let’s Take a Closer Look at the Various Properties of Acrylic Resin:
Surface Hardness
Acrylic’s surface hardness surpasses many plastics but is still prone to scratching relative to glass. Polishing or protective coatings can mitigate scuff marks.
UV Stability
Acrylic is remarkably UV resistant, maintaining clarity and mechanical properties under prolonged sun exposure—outperforming materials like polycarbonate that may yellow over time.
Transmittance
Its optical transmittance can exceed 90%, making acrylic ideal for windows, lenses, or display panels needing consistent light passage.
Chemical Resistance
While acrylic resists many mild chemicals, certain solvents or alcohols might cause stress cracking. Machinists must ensure that coolants and cleaning agents don’t degrade PMMA.
Density
At around 1.18 g/cm³, acrylic is roughly half as dense as glass, aiding in lighter CNC machining parts that can be easily transported or handled.
Tensile Strength
Acrylic typically offers tensile strength in the 70 MPa range, suitable for moderate loads, but not on par with high-strength alloys.
Flexural Strength
Usually between 100–120 MPa, indicating moderate resistance to bending before fracture.
Compressive Strength
Acrylic can endure decent compression loads but will fail under intense, localized force. Adequate support is key.
Modulus of Elasticity
Typically around 2,400 MPa, reflecting moderate stiffness and shape retention under stress.
Impact Resistance
While more impact-resistant than glass, acrylic is not unbreakable. Special formulations or copolymers can boost toughness.
Coefficient of Thermal Expansion
Acrylic expands more than metals under heat, meaning design must account for dimensional shifts in high-temperature environments.
Heat Deformation Temperature
Around 90–100°C, requiring cautious approach for high-heat or friction-laden CNC machining processes.
Light Transmittance
Maintains around 92% transmittance for clear versions, explaining its wide usage in lens or display applications.
Water Absorption
Relatively low, though storing or using acrylic in high humidity could see minor dimensional changes.
These properties shape the strategies for CNC machining factory setups, from tool selection to post-processing. By appreciating acrylic’s mechanical and optical nuances, engineers craft robust CNC machining parts that serve reliably in automotive, electronics, and architectural contexts. Such knowledge also fuels CNC machining fixture design choices, ensuring stable, damage-free engagement with the workpiece.
Acrylic (PMMA) is not only machine-friendly but also adaptable to different manufacturing processes. Whether you require prototypes, mass production, or specialized shapes, there is likely a corresponding method. Below, we overview the most prevalent processing technologies—ranging from CNC machining to injection molding—that highlight the versatility of acrylic in modern manufacturing contexts.
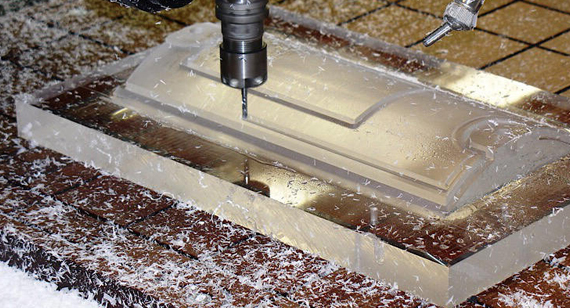
CNC machining stands out for producing intricate shapes with excellent surface finishes. Milling, turning, and routing are standard operations, each requiring optimized speeds and feeds to avoid chip welding or scorching. CNC acrylic machining parts can achieve tight tolerances, polished edges, and complex 3D contours, making them ideal for enclosures, optical elements, and specialized mechanical components.
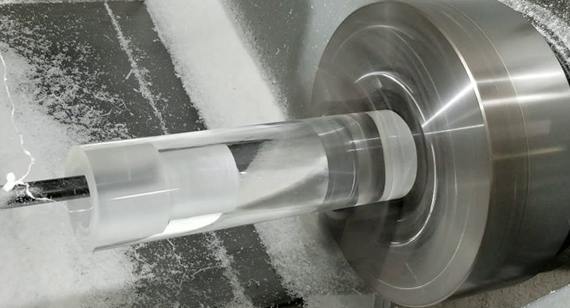
Turning acrylic on a lathe yields symmetrical shapes—like rods, tubes, or spherical surfaces—useful for automotive or optical instrumentation. Key success factors include carefully choosing carbide or diamond inserts, controlling depths of cut, and ensuring coolant or air-blast management. This approach helps deliver consistent part geometry and a near-glossy finish.
Injection Molding Acrylic
For high-volume production, injection molding is cost-effective. The acrylic is heated to liquefy and then injected into metal molds under pressure. While setup costs can be significant due to mold fabrication, the per-part cost drops dramatically in mass production. Transparent automotive lenses or large panels often derive from injection molding, albeit with post-processing for gating marks or finishing edges.
Acrylic Extrusion
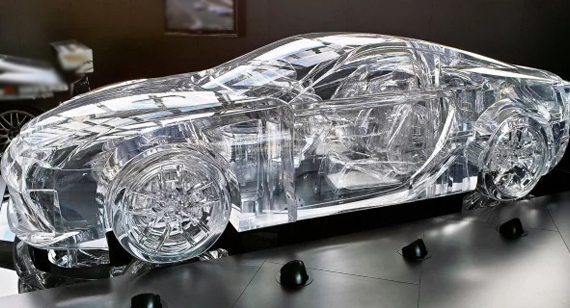
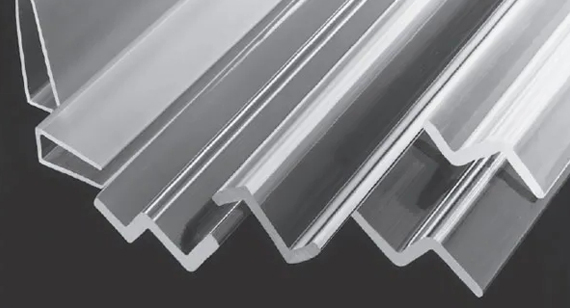
Extrusion pushes molten acrylic through a die to form continuous lengths of profiles like rods or sheets. The result is extruded acrylic typically featuring uniform cross-sections. Though cost-efficient for large volumes, extruded acrylic may hold less consistent dimensional properties or lower optical clarity compared to cast variants—something to weigh in custom CNC machining.、
Acrylic Welding
Acrylic can be solvent-welded or fused using adhesives, generating strong, near-invisible joints. Laser or ultrasonic welding also works, though these methods require precise alignment. This bonding ability aids in assembling large parts from smaller CNC cuts, preserving optical clarity with minimal distortion.
Mixing
While acrylic is usually formed from pure PMMA, it can be blended with other polymers or additives for specialized properties. Anti-static, flame-retardant, or tinted blends are common in electronics or medical fields. However, machinability may vary depending on the additive ratio, affecting tool wear or cutting temperatures.
CNC Drilling Acrylic
Drilling acrylic demands special drill bits featuring a 90–150° tip angle and smooth flutes for chip evacuation. Peck drilling cycles frequently used for deep holes reduce friction heat accumulation. Using coolant or air blasts keeps local temperature moderate, preventing cracks.
CNC Engraving Acrylic
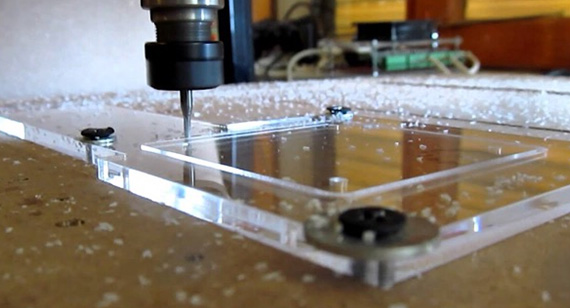
Engraving shallow designs, text, or logos in acrylic is straightforward if done with optimized speeds to avert edge chipping. Engravers can replicate intricate details for signage or brand marking. The transparent nature of PMMA allows backlit or colored effects that highlight engraved patterns.
CNC Cutting Acrylic
Milling or routing acrylic sheets can yield crisp edges but must manage feed rates to avoid melted areas or burrs. Properly executed, CNC cutting can produce complex outlines for enclosures, display panels, or protective shields with minimal finishing needed.
CNC Laser Cutting Acrylic
Laser cutting excels at fast, contact-free shaping of acrylic sheets, often delivering near-polished edges. However, scorching can happen if settings are off. Laser cutting suits decorative or architectural components but lacks the dimensional control of mechanical milling for highly precise mechanical fits.
CNC Laser Engraving Acrylic
By focusing a laser beam, operators engrave shallow designs, text, or patterns. This technique offers high speed and resolution but can produce heat-affected zones that cloud or discolor surfaces. Mastery of laser parameters ensures a consistent, aesthetically pleasing outcome.
In summary, PMMA CNC machining parts can originate from an array of processes—CNC, injection molding, or laser-based—reflecting acrylic’s adaptability in CNC machining manufacturing. Understanding the pros and cons of each method guides better decisions in both prototyping and long-run production. Proper synergy between method and material ensures robust, visually appealing acrylic solutions for myriad applications.
Transitioning from conceptual design to finished acrylic components involves a series of coordinated steps in the CNC machining services pipeline. Whether focusing on CNC prototype machining or full-scale production, each stage—from CAD modeling to final cut—demands precision and methodical planning. Below is a structured approach to ensure your CNC acrylic projects yield immaculate, high-quality PMMA parts every time.
Design and CAD Modeling
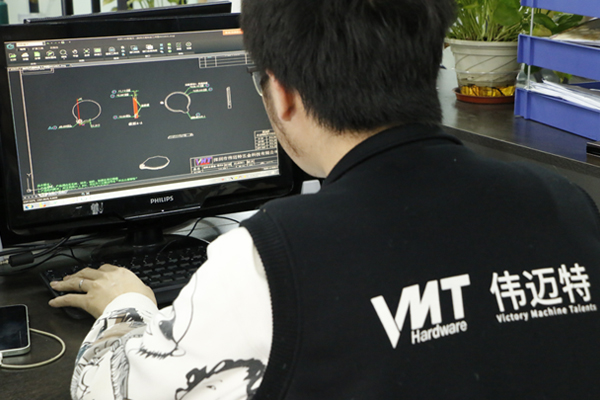
Begin with thorough CAD modeling. Include features like chamfers, fillets, or engraved patterns that exploit acrylic’s translucent or aesthetic potential. Ensure the geometry respects both the part’s functional requirements and feasible cutting strategies. Consider a minimal wall thickness that avoids flex or distortion under clamp pressure. The CAD data sets the foundation for all subsequent machining steps.
Select an acrylic grade suited to your end-use scenario—cast, extruded, or modified PMMA. Cast acrylic generally offers superior optical clarity and less internal stress, making it a favorite for high-end components. Evaluate color options if a tinted or frosted finish is desired. Confirm thickness and sheet size availability, aligning with your planned milling or turning operations.
Preparing the CNC Machine
Calibrate the CNC machine, referencing the correct coordinate system and ensuring all tool offsets are updated. Inspect the spindle, fixtures, and coolant lines or air blasts for cleanliness. If the job demands multi-axis milling, confirm the rotary table or indexing head is properly zeroed. Regular maintenance checks avert issues like misalignment or vibration that can mar acrylic’s finish.
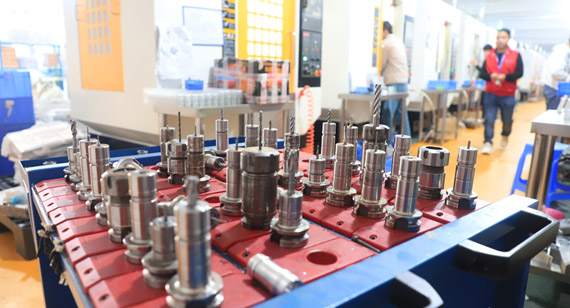
CNC acrylic machining parts typically rely on carbide or diamond tooling with polished flutes to reduce friction and chip buildup. Spiral end mills with upward chip ejection help preserve clarity and prevent melted edges. For drilling, specialized acrylic bits or countersinks might be needed. Keep a stock of fresh, sharp tools to minimize micro-fractures.
Securing Acrylic
Choose a fixture design that supports the entire workpiece to resist deflection. Vacuum tables or fixture plates can handle large sheet acrylic, while vises or specialized clamps may secure smaller or prismatic pieces. Add protective pads or tape to avoid surface scratches. Confirm clamps apply even pressure, preventing part bowing.
Setting Machining Parameters
Spindle speeds of 8,000–15,000 rpm are common, with feed rates adjusted per the specific geometry—slower for intricate details, faster for broad cutouts. Depth of cut is typically limited to reduce heat accumulation. Chip load must be balanced to ensure efficient material removal but not so aggressive that it chips or deforms the edge. Use ample coolant or air blasts to keep the tool area cool and clear of plastic chips.
CAM Programming
Generate toolpaths in CAM software, specifying approach strategies (e.g., spiral ramping, trochoidal milling) that reduce heat and chatter. Using smaller step-downs for finishing passes refines the surface. Validate the job with a simulation, watching for collisions or excessive tool engagements.
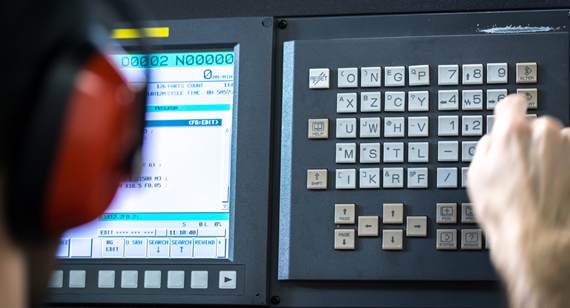
Running a Test Cut (Optional)
When feasible, prototype a small portion on scrap acrylic or a leftover stock piece to verify cut quality, surface finish, and dimensional accuracy. Adjust feeds, speeds, or the depth of cut if melting or chatter emerges.
Machining Parts
Commence the full machining operation. Monitor spindle load, temperature, and the condition of cut edges. If excessive burrs appear or the edges whiten, halt operations, refine settings, and resume. Upon completion, remove the part carefully, avoiding direct contact on polished zones.

Following these structured steps in CNC acrylic machining ensures each stage—design to post-machining—supports the creation of top-tier PMMA CNC machining parts. By systematically checking each requirement, you foster consistent, efficient, and aesthetically pleasing outcomes that satisfy both functional and visual demands.
Acrylic’s transparent nature and aesthetic appeal often hinge on the final surface finish. Whether your CNC acrylic machining parts require crystal-clear edges or a textured effect, a variety of finishing techniques can achieve the desired outcome. Each method offers unique advantages in terms of gloss level, clarity, and cost, enabling manufacturers to tailor the surface quality to application-specific needs. Below, we explore popular finishing processes that transform machined PMMA into visually striking components.
Flame Polishing
In flame polishing, a heat source (commonly a gas flame) briefly contacts the acrylic edge, melting the surface just enough to create a smooth, glossy finish. This approach erases micro-scratches left by cutting tools, returning clarity to an otherwise frosted or rough edge. While flame polishing is quick and highly effective for external edges, controlling the flame requires skill to prevent scorching or warping in thin sections.
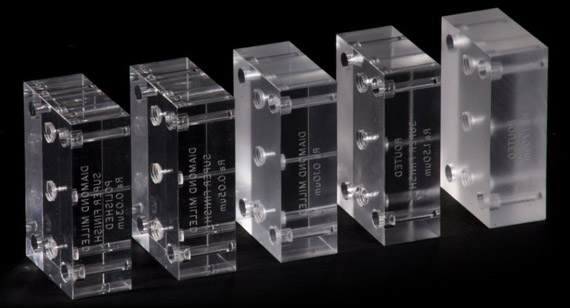
Polishing and Grinding
For more manual control over the final sheen, operators use buffing wheels with polishing compounds or progressively finer sandpaper grits. This approach allows for near-uniform finishing on curved surfaces or intricate shapes. With careful progression—from coarse grit to high grit—this mechanical polishing approach can yield surfaces nearly as transparent as cast edges. Though more labor-intensive, it’s ideal for custom or one-off CNC machining parts demanding top-tier clarity.
Grinding
Grinding typically addresses dimensional adjustments or shape refinements on acrylic edges. While not always producing a mirror polish, it removes protrusions or warping effectively. A subsequent polish step is common after grinding to restore transparency. Grind operations must keep friction and heat in check to prevent the edges from melting or distorting, especially in thick pieces.
Vapor polishing uses solvent vapor (commonly methylene chloride) to melt a micro-layer of acrylic, leveling out surface imperfections. By quickly sealing the part in a vapor chamber, technicians can produce a smooth, glass-like finish on even the most complex internal features. This method is especially popular for medical or optical components in custom CNC machining scenarios, though compliance with solvent safety and part geometry constraints is crucial.
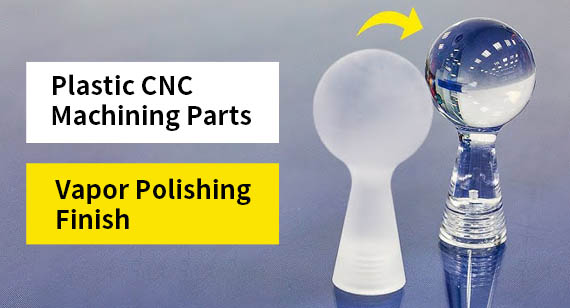
Chemical Polishing
Similar to vapor polishing, chemical polishing immerses the part in a mild solvent or bath that dissolves micro-surface scratches. This controlled dissolution smoothens irregularities without requiring mechanical buffing. Though it produces a more uniform finish than manual polishing for intricate areas, precise timing and concentration are vital to avoiding over-etching or dimensional shifts.
Sandblasting
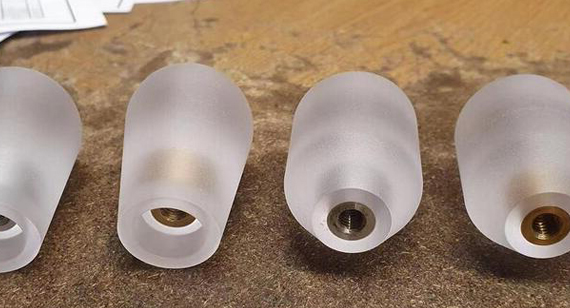
For matte or frosted finishes, a low-pressure sandblasting method can uniformly texture acrylic surfaces. This aesthetic is common for signage, decorative panels, or privacy screens. The final texture depends on blast media grit size and pressure, creating a consistent, softened light diffusion effect. While sandblasting is fast, it partially reduces transparency—a desirable or undesirable effect depending on your design goals.
Paints and Coatings
In certain CNC machining factory contexts, painting acrylic yields custom colors or specialized finishes. Paint adherence can be robust with proper surface prep, though optical clarity is usually lost. Protective coatings like anti-scratch layers, UV-blockers, or anti-fog treatments may also be applied to safeguard the part’s longevity or enhance its performance in harsh conditions.
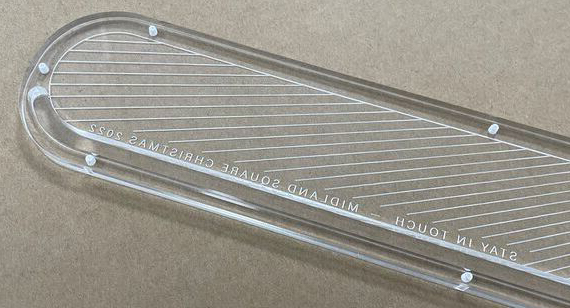
Laser Engraving
Laser engraving selectively removes acrylic layers to form text or patterns with crisp detail. The resulting matte engravings can contrast with clear surfaces, or be backlit for dramatic effect in signage or display products. Controlled beam parameters ensure minimal melting and clean edges, though achieving deeper engravings may demand multiple passes.
Dip Coating
Dip coating immerses parts in a liquid polymer or solution that dries to form a protective overlay. This method can bolster impact resistance, impart coloration, or add a special finish like anti-glare or anti-fingerprint. Widely used in automotive or consumer electronics, dip coating extends acrylic’s functional range and scratch resistance.
By mastering these finishing methods, you can transform rough-edged PMMA CNC machining parts into glossy showpieces or specialized functional components for a variety of industries. Whether you opt for quick flame polishing or sophisticated chemical vapor processes, the right surface finish ensures your CNC acrylic machining parts stand out in clarity, performance, and professional appeal.
Acrylic, also known by its chemical name PMMA (polymethyl methacrylate), is a premier plastic for CNC machining parts demanding a blend of optical clarity, durability, and cost-effectiveness. Beyond these obvious properties, acrylic boasts an array of structural and functional benefits that make it compelling for everything from prototypes to large-scale commercial applications. Below, we highlight the reasons acrylic stands as a top choice in CNC machining manufacturing, particularly for industries where transparent or semi-transparent components are essential.
50% Lighter Than Glass
Acrylic significantly reduces weight compared to glass, yet retains a similar level of clarity. This advantage aids industries like automotive or aerospace, where every gram matters. Lighter parts also decrease shipping and handling costs, boosting overall productivity in custom CNC machining settings.
Excellent Weather Resistance
With inherent UV stability, acrylic parts can endure prolonged exposure to sunlight and temperature shifts without yellowing or losing mechanical strength. This weather-resistant quality suits outdoor architectural features, automotive lenses, and marine applications.
Resistant to UV Radiation
Acrylic’s minimal UV degradation outperforms many competing plastics, retaining transparency over time. This resilience ensures displays, signs, or protective panels maintain their clarity, crucial for extended service lifespans.
Optical Clarity
Often described as having transparency up to 92%, acrylic nearly rivals glass in light transmission. Industries needing see-through housings, control panels, or aesthetic features leverage acrylic’s unmatched clarity for crisp, distortion-free views.
High Strength and Durability
Despite being lighter, acrylic’s tensile and impact strength surpass glass, minimizing fracture risks in mishandling or moderate impacts. Coupled with easy CNC machining fixture design, acrylic’s structural capability can sustain functional loads in mechanical assemblies.
Easy to Process
Thanks to its softness and relatively low melting point, acrylic machines smoothly when correct feeds and speeds are used. This characteristic is beneficial for both CNC prototype machining and short-run production, allowing iterative design changes without complicated setups.
Chemical Resistance
While not impervious to all solvents, acrylic does handle numerous mild chemicals without degradation, making it suitable for certain lab or food processing environments. Proper coolant selection in CNC machining services preserves acrylic’s integrity.
Heat Resistance
Acrylic’s heat deformation temperature hovers around 90–100°C, acceptable for many general-purpose applications. Specialized variants or controlled thickness can handle mildly elevated temperatures, ensuring shape retention in moderate thermal conditions.
Surface Hardness
Though not as hard as glass, acrylic’s scratch resistance outranks many thermoplastics. Additionally, minor scratches can often be buffed out or polished, effectively restoring surface smoothness.
Dimensional Stability
Acrylic’s stable structure—particularly in cast or extruded grades—makes it ideal for precision CNC parts. Unlike some thermoplastics prone to warping, well-clamped acrylic remains dimensionally accurate throughout machining and in final applications.
Transparent
Transparency is acrylic’s hallmark, enabling clear electronics enclosures, LED housings, or protective goggles. Such clarity also enhances part aesthetics, which can be vital for consumer product design or architectural usage.
Good Rigidity
Acrylic’s stiffness ensures that components hold shape under moderate stress. For structural or ornamental elements, rigid acrylic outperforms flexible counterparts like polypropylene or polyethylene.
Good Abrasion Resistance – Surface Scratches Can Be Easily Polished Away
Minor blemishes that accumulate over repeated handling can be removed through buffing or flame polishing, prolonging the product’s aesthetic lifespan.
Modified for Increased Gloss and Hardness
Some acrylic grades incorporate advanced coatings or additives to enhance hardness or add decorative finishes, broadening possible uses in CNC machining factory lines.
Versatility
Acrylic’s machinability across turning, milling, drilling, and polishing processes fosters unparalleled design freedom. This adaptability accommodates everything from functional prototypes to complex end-user parts.
Polishable Edges
Flame or buff polishing can quickly transform raw, milled edges into crystal-clear finishes, saving time and labor compared to other plastics requiring multi-step finishing.
Adhesion
Acrylic responds well to adhesives and solvents, facilitating seamless bonding for multi-piece assemblies or large enclosures. This ease of joinery proves invaluable in custom CNC machining or industrial applications needing structured panels.
Acrylic’s synergy of clarity, moderate strength, and machinability cements its status as a prime candidate for CNC machining parts. Whether your domain is retail displays, aerospace windows, or medical enclosures, harnessing acrylic’s unique traits unlocks robust, visually striking, and cost-effective product solutions.
Acrylic (PMMA) isn’t monolithic—numerous grades and manufacturing methods yield slight variations in optical clarity, mechanical properties, and machinability. Selecting the right acrylic type ensures your CNC machining parts align with functional requirements, be it extreme transparency, weather resistance, or cost efficiency. Below, we cover the key acrylic categories, explaining how each suits certain CNC machining manufacturing scenarios.
Cast Acrylic
Cast acrylic forms when liquid PMMA monomer is poured between two glass plates and cured. This slower, controlled process results in minimal internal stress and excellent optical clarity, making it the premium choice for high-end displays or lenses.
Applications
Extruded Acrylic
Extruded acrylic is manufactured by pushing molten acrylic through a die, yielding continuous sheets or rods of consistent dimensions. This faster, high-volume approach is cost-effective but can produce more internal stress than cast acrylic.
Applications
Continuous Cast Acrylics
Combining aspects of both casting and extrusion, continuous cast acrylic cures in a continuous process, producing stable and uniform sheets with reduced internal stress compared to purely extruded forms.
Applications
Modified Acrylics
Modified acrylics incorporate additives or co-monomers to alter mechanical, thermal, or optical behaviors—like improved impact resistance or custom color tints. These modifications can ease certain machining complexities, though they may slightly reduce clarity or stiffness.
Applications
Acrylic Composites and Laminates
These materials fuse acrylic layers with other resins, fiber reinforcements, or adhesives. The outcome might be an acrylic laminate with improved strength, distinct aesthetics, or tailored properties like ballistic resistance.
Applications
Frosted Textured Acrylic
Frosted or textured acrylic is treated chemically or mechanically to create a translucent, matte-like surface that diffuses light. It often finds use in decorative or privacy-focused applications.
Applications
By aligning these acrylic varieties with your custom CNC machining objectives, you can optimize clarity, mechanical resilience, or cost, ensuring the final CNC acrylic machining parts meet the rigorous demands of your industry. Thoughtful material selection forms a cornerstone of CNC machining design, delivering robust, visually striking outcomes regardless of volume or complexity.
Due to its optical clarity, rigidity, and relative ease of machining, acrylic finds application across multiple industries. From functional prototypes in automotive to architectural glazing, the uses of CNC acrylic machining parts are extensive. Below, we detail specific domains where acrylic’s attributes truly shine, highlighting why designers, engineers, and manufacturers rely on PMMA for both aesthetic and practical demands.
Automotive Industry
Acrylic serves in internal dashboards, light covers, decorative trims, and custom add-ons. Its transparent nature is ideal for gauge clusters or LED housings, providing longevity against UV exposure. Lightweight acrylic also helps reduce vehicle mass, contributing to improved fuel efficiency or electric vehicle range.
Lighting and Electronics
Acrylic’s ability to evenly diffuse or refract light makes it a top choice for LED fixtures, display panels, and electronic device covers. The material’s optical clarity and scratch resistance suit touchscreen panels or protective screens, ensuring crisp visibility. Meanwhile, flame polishing edges can enhance the aesthetic of product enclosures, giving a premium, glass-like finish.
Healthcare
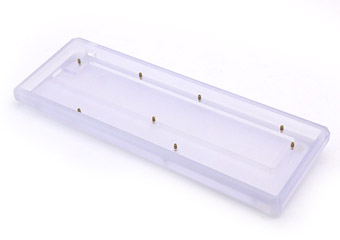
In labs, hospitals, or medical device engineering, acrylic is used for glove boxes, protective shields, or diagnostic apparatus. Its low reactivity and easy sterilization cater to stringent hygiene standards. Acrylic’s transparency facilitates direct monitoring of samples or processes, central to modern healthcare instrumentation.
Architecture and Construction
From skylights and windows to decorative partitions, acrylic’s weather resistance and high impact strength ensure robust performance outdoors. It weighs far less than glass, easing installation challenges and structural loads. Additionally, frosted or tinted variants can augment architectural projects, providing privacy or design flair without sacrificing natural light infiltration.
Aerospace and Defense
Optical clarity, combined with lightweight durability, places acrylic in aircraft windows, cabin partitions, and protective guards. Here, weight reduction is paramount, and acrylic’s stable mechanical profile meets these demands for non-critical structural elements. Some ballistic or bullet-resistant laminates also incorporate acrylic layers for advanced impact absorption.
Marine
Marine windows, hatches, and dashboards often utilize acrylic, capitalizing on its saltwater corrosion resistance and optical clarity. Smooth, well-sealed edges are easy to maintain, curbing salt or algae buildup. Its inherent UV resistance ensures these CNC acrylic machining parts maintain transparency and shape under prolonged sun exposure and high humidity.
Art and Decoration
Artists and decorators prize acrylic sheets for creating sculptures, frames, signage, or interior design elements. Clear or colored acrylic can be fashioned into complex shapes via CNC machining, offering a contemporary, minimalist aesthetic. Protective coatings or post-finishing polishes yield a luxurious look that resonates in galleries, boutiques, and hospitality venues.
Some of the Most Common Products That Can Be Made Using Acrylic Sheet Include:
From functional to aesthetic, acrylic’s range of applications demonstrates the adaptability that CNC machining harnesses, validating PMMA’s role as a vital material in modern manufacturing processes.
While CNC machining acrylic can yield stunning transparency and strong mechanical performance, it also presents challenges like overheating, chipping, or suboptimal surface finishes. To navigate these pitfalls and achieve polished, dimensionally accurate parts, manufacturers must tailor their approach. Below are practical tips for both seasoned machinists and newcomers, ensuring your custom CNC machining workflow meets the highest quality benchmarks.
Tip 1 – Protect Your Material
Acrylic surfaces scratch easily, so safeguarding the sheet or block before and during machining is paramount. Leave protective film intact until just before the final stage, or apply a thin plastic film on all surfaces to minimize scuffs. Ensure your CNC machining fixture design includes non-abrasive contact points. Handling the raw stock carefully from storage to clamp-up also prevents cosmetic flaws that are difficult to remove.
Tip 2 – Use the Right Drill Bit
Selecting specialized acrylic drill bits or those ground with a 90–150° tip angle optimizes hole quality. Conventional metal bits may cause micro-cracking or deliver ragged edges, while plastic-specific designs eject chips more cleanly. Additionally, a slow peck cycle helps avoid heat accumulation and potential part distortion.
Tip 3 – Set the Right Feed Rate
A feed rate too high might induce chatter or stress cracks; too slow can rub the acrylic and raise friction-based heat, risking melting. Fine-tune feed based on tool diameter, spindle rpm, and the acrylic’s thickness. Observing chip shape and color is a quick method to gauge if your feed rate is appropriate.
Tip 4 – Use the Right Revolutions per Minute (RPM)
Spindle speeds in the 8,000 to 15,000 rpm range often serve as a good starting point for CNC machining parts made of acrylic. Factors like tool diameter, cutting flute count, and depth of cut also matter. If edges show a frosted or burned appearance, you may need to reduce rpm or incorporate more effective cooling.
Tip 5 – Set the Pass Depth to the Correct Inches
Passing with incremental depths (like 0.02–0.06 inches) can mitigate friction and limit meltdown hazards. For thicker stock, multiple passes with moderate depths ensure stable temperature management and preserve part geometry. Although deeper passes expedite roughing, finishing passes with lighter cuts produce polished edges.
Tip 6 – Cutting Direction Is Important
Climb milling (where the cutting motion runs in the same direction as the feed) typically works best for acrylic, yielding smoother edges. Conventional milling, however, may produce a rougher surface or risk chip-out. Evaluate part geometry carefully to determine the best directional approach per milling pass.
Tip 7 – Don’t Forget the Ramp Feature
Many CAM software packages allow ramping in, which gradually lowers the cutting tool into the acrylic. This strategy prevents plunging directly downward at full depth, lessening stress on the tool tip and diminishing melt or chip-weld potential. For contouring or pocketing, ramping is especially beneficial for longer tool life and consistent surface finishes.
By integrating these guidelines into your CNC machining factory standard procedures, you can systematically diminish production setbacks, reduce scrap, and uphold a top-tier aesthetic for your CNC acrylic machining parts. The synergy between correct speeds, feeds, protective steps, and finishing methods translates to reliable, visually appealing components in any custom CNC machining environment.
Machining acrylic involves more than just setting speeds and feeds; the interplay between cutting tools, fixture design, and material properties can profoundly impact final part quality. By anticipating potential pitfalls like chip buildup or heat distortion, you can tailor your strategies to keep CNC acrylic machining parts flawless. This section distills core considerations to keep front-of-mind in CNC machining services for acrylic.
Choosing the Right Cutter
Sharp, uncoated carbide end mills or specialized acrylic bits generally yield the best results. Diamond-coated or polished-edge cutters minimize friction and help produce a near-mirror finish. The chosen geometry—a single flute or two flutes—can also facilitate faster chip removal, reducing the chance of re-welding and heat hotspots along the cut path.
Using the Right Drill Bit and Ramps
For drilling, bits designed specifically for plastics typically feature a sharper tip angle. Instead of plunging directly to the full depth, employing ramp or peck cycles encourages chip breakage and better cooling. This approach counters acrylic’s tendency to soften under friction, preventing material reflow and burr formation.
Monitoring Cutting Depth and Direction
Deep cuts at high speeds heighten the possibility of melting or chatter. Machinists often break down cuts into multiple passes, gradually stepping down the tool. Additionally, using climb milling for external contours or finishing passes fosters superior edge integrity, diminishing the risk of damage or poor surface finish.
Setting the Right Feed Rate
Balancing feed rate with spindle speed is crucial: too low a feed can cause friction-based heating, too high can lead to chipped edges. Observing chip shape and color, along with spindle load feedback, helps calibrate feeds on the fly. In a CNC machining factory environment, advanced monitors can automate feed adjustments as conditions evolve.
Choosing the Right Acrylic Material
Finally, matching acrylic grade (cast vs. extruded) to the project’s demands ensures consistent mechanical and optical performance. Cast acrylic offers better clarity and dimensional stability, suitable for high-end parts or large enclosures, while extruded acrylic is cost-effective for simpler shapes or moderate tolerances. This synergy between correct material selection and optimized machining parameters ultimately defines how well your CNC acrylic machining parts meet project goals.
Acrylic’s optical clarity and moderate strength make it a go-to plastic for myriad applications, yet effective machining of PMMA depends on reconciling multiple technical and operational aspects. Below, we examine the pivotal elements—like workholding, CNC cutting strategies, and post-processing—that shape success in CNC machining. By addressing these considerations, you ensure your acrylic parts deliver both functional utility and aesthetic allure.
Workholding
Securing acrylic demands special attention to avoid deformation or stress cracking. CNC machining fixture design that uniformly distributes clamping pressure is vital, especially for thin sheets or large panels. Vacuum tables can be especially useful, while vise jaws may integrate soft inserts (like rubber or plastic) to protect the surface. Ensuring minimal movement under cutting loads is crucial for both dimensional accuracy and surface smoothness.
CNC Machining
Acrylic typically benefits from balanced parameters: high rpm, moderate feed rates, and conservative depth of cut. Over-aggressive settings might cause heat buildup, warping, or poor finish. Additionally, specialized tool geometries with polished flutes or diamond coatings are available to reduce friction and maintain part clarity. Some shops even resort to air-cooling or high-pressure coolant to keep temperatures stable.
Machined Acrylic
The final properties of machined acrylic—like transparency, edge gloss, or dimensional tolerance—depend significantly on the synergy of design, tooling, fixture, and operating conditions. Post-machining processes, e.g., flame or vapor polishing, can further refine edges or surfaces. The success of PMMA CNC machining parts in demanding fields such as medical or aerospace underscores how effectively these factors intersect to produce defect-free, optically pristine components.
One of the most common challenges in CNC acrylic machining parts is unwanted melting or softening, leading to haze, warping, or re-welded chips on the surface. Acrylic’s low glass transition temperature means friction must be carefully controlled. Here, we outline proven tactics—spanning speed, cooling, and tool geometry—to avert thermal damage.
Optimizing Spindle Speed and Feed Rates
Recommendations
Maintain moderately high spindle speeds in the 8,000–15,000 rpm range but pair them with feed rates that allow efficient chip evacuation. Overly slow feeds can cause friction-based heating. Adjusting speeds according to part thickness or geometry prevents concentrated heat pockets.
Choosing a Tool with the Right Number of Edges
Recommendations
Use single or double flute cutters with polished flutes to minimize friction. More flutes can lead to restricted chip flow and thus heat buildup, risking melts at deeper passes. Ensuring each flute effectively removes chips helps keep cutting temperatures manageable.
Cooling Techniques
Recommendations
Incorporate air blasts or mist coolant to draw away heat from the cutting zone. Some shops rely on water-soluble coolants specifically formulated to not degrade acrylic. Sufficient coolant application fosters stable tool temperatures, lowering meltdown probability.
Deep Hole Pecking
Recommendations
When drilling deeper holes, adopt peck cycles. Repeatedly retracting the drill clears chips, reducing friction and local heat. The tool re-entering the hole at intervals also refreshes coolant contact, ensuring temperature remains safe.
Proper Clamping to Avoid Vibration
Recommendations
Acrylic can vibrate if poorly supported, generating friction and heat at contact points. Uniformly distribute clamp forces and consider vacuum or specialized jaws for large parts. Limiting vibration aids in preventing localized hot zones and friction melting.
Choosing the Right Tool Geometry
Recommendations
Selecting a tool with a higher rake angle and polished cutting edges helps slice acrylic cleanly without generating excessive friction. Rounded tips or specialized plastic cutting end mills cut smoothly, lessening the mechanical effort and heat in the cutting zone.
Directions for Down-Milling
Recommendations
Whenever feasible, adopt climb (down) milling for finishing passes on acrylic. The tool rotation synergy with feed direction fosters reduced friction and lowers the risk of chipped or melted edges. This approach also promotes a clean shearing action, crucial for optical clarity.
Additive processes like 3D printing offer design freedoms, but can yield weaker or rougher finishes unsuited to high-end optical or mechanical demands. Injection molding excels at mass-producing uniform parts with minimal waste but involves high upfront tooling costs. CNC machining, by contrast, stands out for customizing shapes, tight tolerances, and quick iteration cycles in CNC prototype machining. By preventing meltdown with the tips above, machinists can harness acrylic’s clarity and mechanical properties cost-effectively—without the complexities of mold fabrication or 3D printing’s limitations.
Though acrylic reigns as a transparent plastic for CNC machining services, other clear plastics, such as polycarbonate (PC) and polystyrene (PS), compete in varied scenarios. Understanding the distinctions in mechanical strength, temperature range, or optical clarity helps you decide if acrylic remains your best bet or if an alternative might better serve your custom CNC machining project.
PMMA
Acrylic (PMMA) stands out for optical clarity, moderate cost, and relatively easy machinability. While not as impact-resistant as polycarbonate, it often surpasses glass in shatter resistance and is typically simpler to polish. Heat constraints demand mindful speed/feed control.
PC
Polycarbonate offers superior impact strength and can handle higher temperatures. However, it lacks the same high-luster clarity as acrylic and can be pricier. Machining polycarbonate may also produce burrs more readily, requiring additional finishing.
ABS
Materials used in automotive braking systems (like ABS plastic) might rival acrylic in certain contexts. Yet, these are typically more opaque and less relevant for purely transparent or aesthetic components. Acrylic remains unmatched for see-through housings requiring sleek aesthetics in automotive interior accessories.
In essence, PMMA persists as the “go-to” for many transparent or decorative CNC machining parts due to its blend of brightness, moderate toughness, and workable machinability. However, confirm your requirements—impact tolerance, chemical exposure, temperature—and gauge if polycarbonate or another resin outperforms acrylic in that niche.
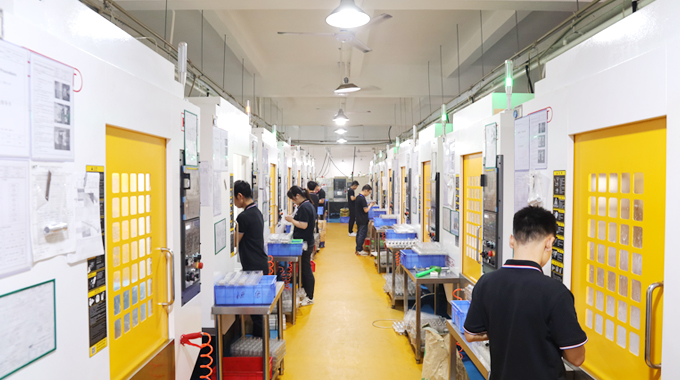
VMT is a proven leader in CNC machining manufacturing, offering a rich portfolio of custom CNC machining solutions tailored for acrylic (PMMA) materials. Our advanced machinery—milling centers, turning lathes, multi-axis setups—coupled with stringent quality protocols ensures your CNC machining parts adhere to exacting tolerances, whether prototypes or high-volume production runs. With specialized fixture designs to protect acrylic surfaces, optimized tool geometries for chip removal, and comprehensive finishing services (polishing, flame finishing, or chemical treatments), VMT guarantees top-tier clarity and structural integrity.
Beyond production, VMT’s engineering team advises on CNC machining fixture design and process optimization, cutting down iteration cycles in CNC prototype machining. Our integrated approach—from design advice to final shipping—helps you scale automotive, medical, consumer, or architectural projects swiftly. Choose VMT for a synergy of expertise, reliability, and exceptional results that exemplify the full potential of CNC acrylic machining parts in modern manufacturing.
Acrylic (PMMA) stands as a versatile, transparent thermoplastic that, when handled properly, can yield high-precision, aesthetically pleasing CNC machining parts. Whether for functional prototypes, specialized optical components, or fully finished consumer goods, acrylic’s unique blend of clarity, moderate hardness, and machinability positions it as a prime candidate for custom CNC machining. By controlling speeds, feeds, and depth of cut—along with employing robust clamping, finishing techniques, and well-chosen acrylic grades—manufacturers can surmount typical challenges like heat distortion or chipped edges.
Moreover, the breadth of finishing options—flame polishing, vapor treatments, sanding—highlights acrylic’s adaptability to exact surface requirements, from a frosted matte to near-glass clarity. Supporting advanced markets, like automotive, marine, and architecture, underscores how PMMA CNC machining parts remain relevant and in high demand. Ultimately, success hinges on balancing materials knowledge, fixture design, process settings, and finishing steps. Mastering these aspects empowers any CNC machining factory or job shop to confidently produce refined, functional acrylic components that meet or exceed stringent quality standards.
1. Is Acrylic Better Than Glass?
Acrylic is about 50% lighter than glass and more impact-resistant, reducing the risk of shattering. It also allows high optical clarity and is easier to machine, but glass surpasses acrylic in scratch resistance and can handle higher temperatures without distortion.
2. Is It Safe to Work With Acrylic?
Yes, acrylic is safe to machine as it doesn’t typically emit toxic fumes. However, dust extraction and protective gear should be in place to avoid inhalation of fine plastic particles. Ensuring moderate machining speeds prevents meltdown that may produce localized fumes.
3. Can I Cut Acrylic with a Router?
Absolutely, you can route acrylic using standard or specialized plastic-cutting bits. Maintain moderate feed rates and use air blasts or coolant to manage heat. A stable CNC machining fixture design also helps avoid chatter and ensures straight, smooth edges.
4. Why Use CNC Machining to Cut Acrylic?
CNC machining ensures precision cuts, repeatability, and minimal risk of part distortion. Unlike manual sawing or laser cutting, CNC machining can produce complex 3D shapes, tight tolerances, and uniform finishes. This method is indispensable for CNC prototype machining and advanced product lines in architectural, medical, automotive, and consumer industries.
